
So you’ve got a figure that has a texture with a lot of small, intricate detail, and you want to really bring it out and make it pop. Maybe it’s fur, maybe it’s chainmail, maybe it’s scales. Either way, you want it to look good, bit you don’t want to paint each individual ring or tuft of fur. While there are painters who will absolutely get that granular with their work, the good news is you don’t have to.
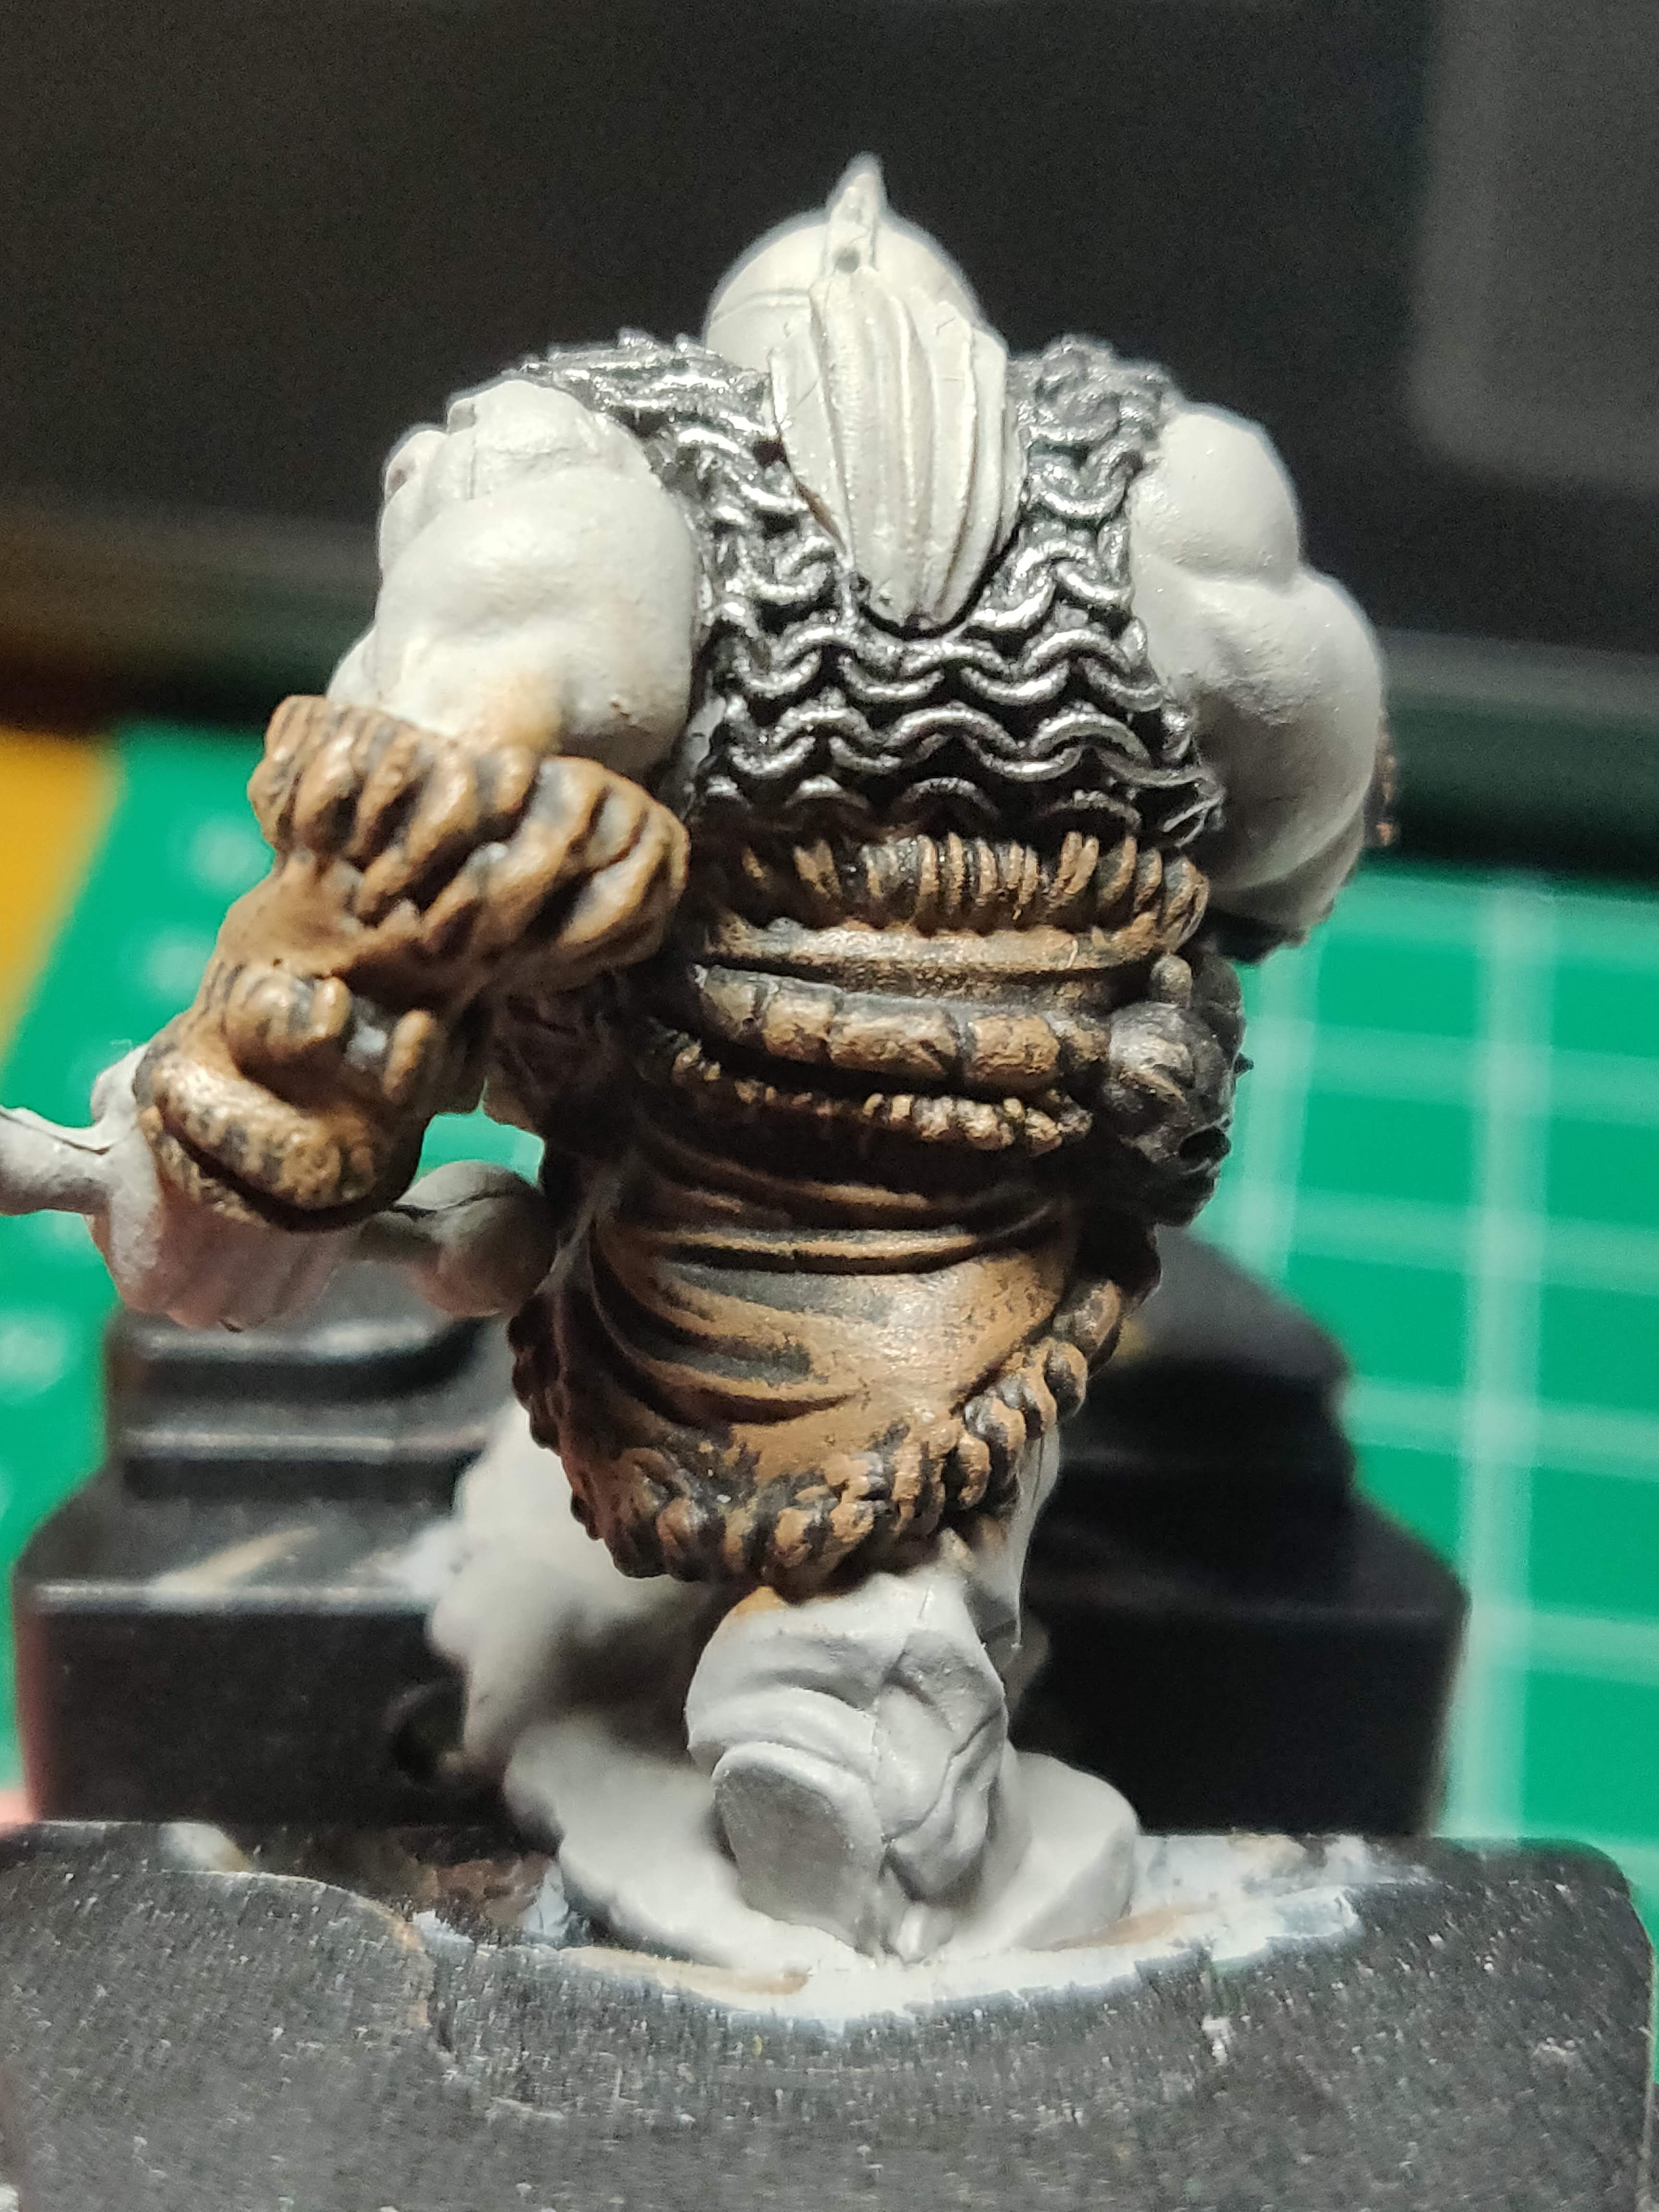
Look at all those rings! 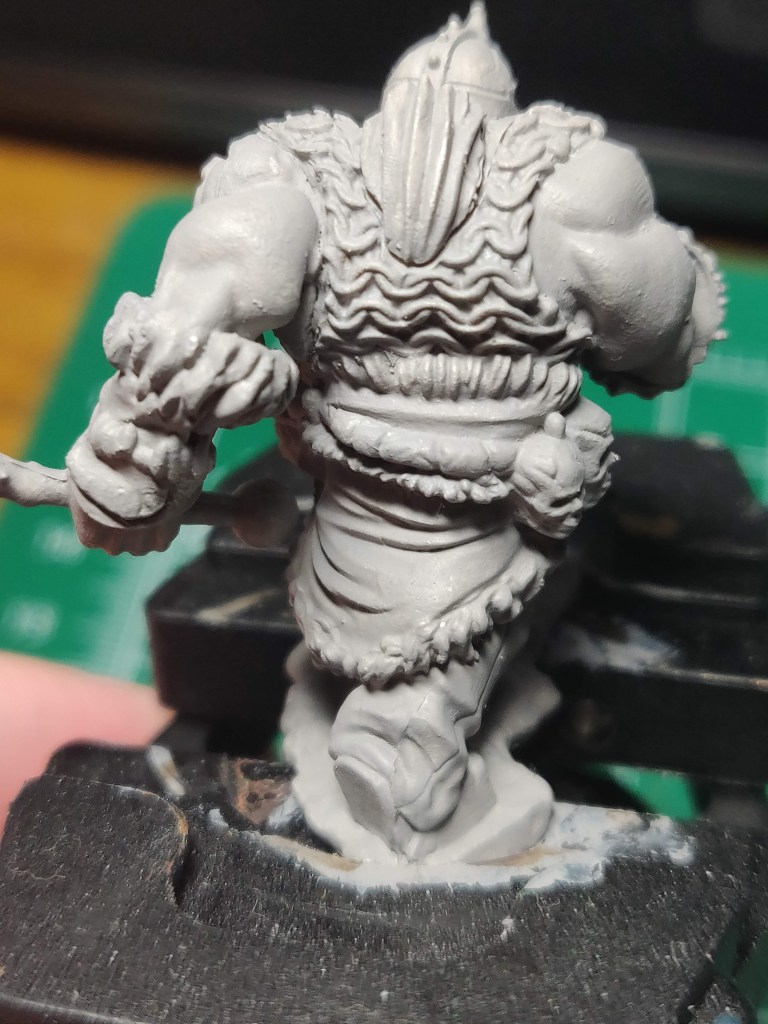
And that fur is a great texture.
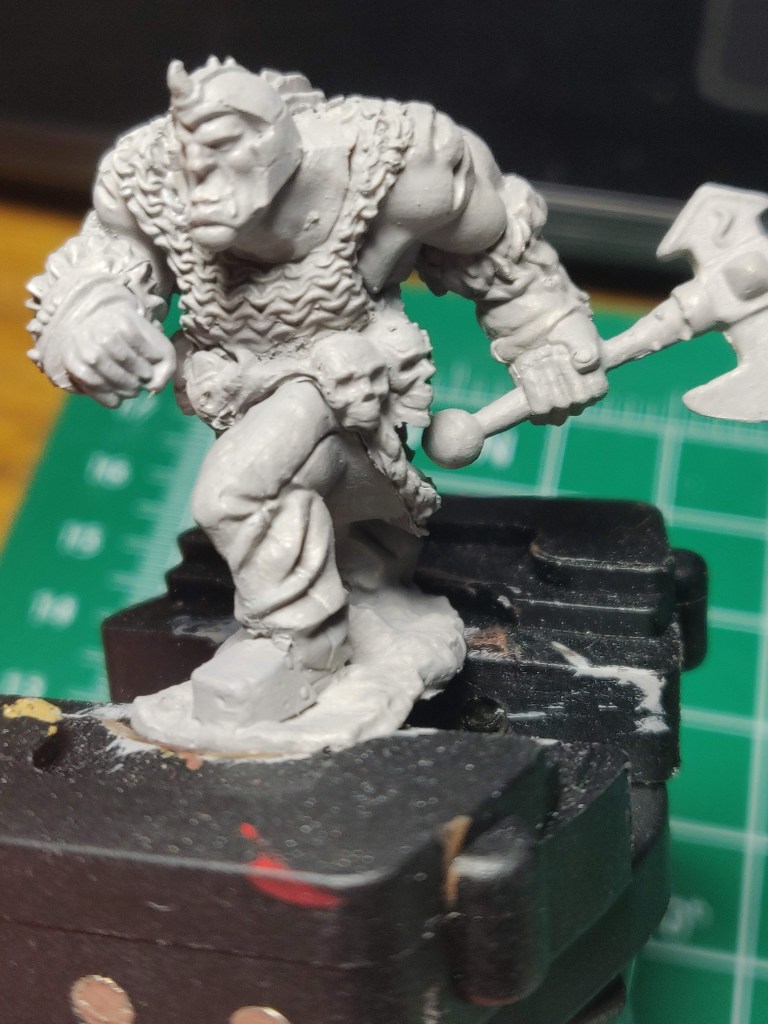
Just look at all that detail! This is the second orc from the Wizkids Orc pack, and overall, I really dig this guy. The chainmail has great detail; usually you don’t see the individual rings on figures of this scale. And the fur is a nice complement to the hard detail of the armor. He’s big, he’s tough, and he means business.
The technique you’re going to want to use to bring out all that great detail is a basic, no nonsense drybrush. What does that mean? Doesn’t paint have to be wet to, well, paint? Not at all! In fact, this is a situation where wet or thinned down paint will actually work against you, running into the recesses and muddying things up. To drybrush, you load up your brush, then wipe it back and forth on a paper towel until no more pigment comes off.
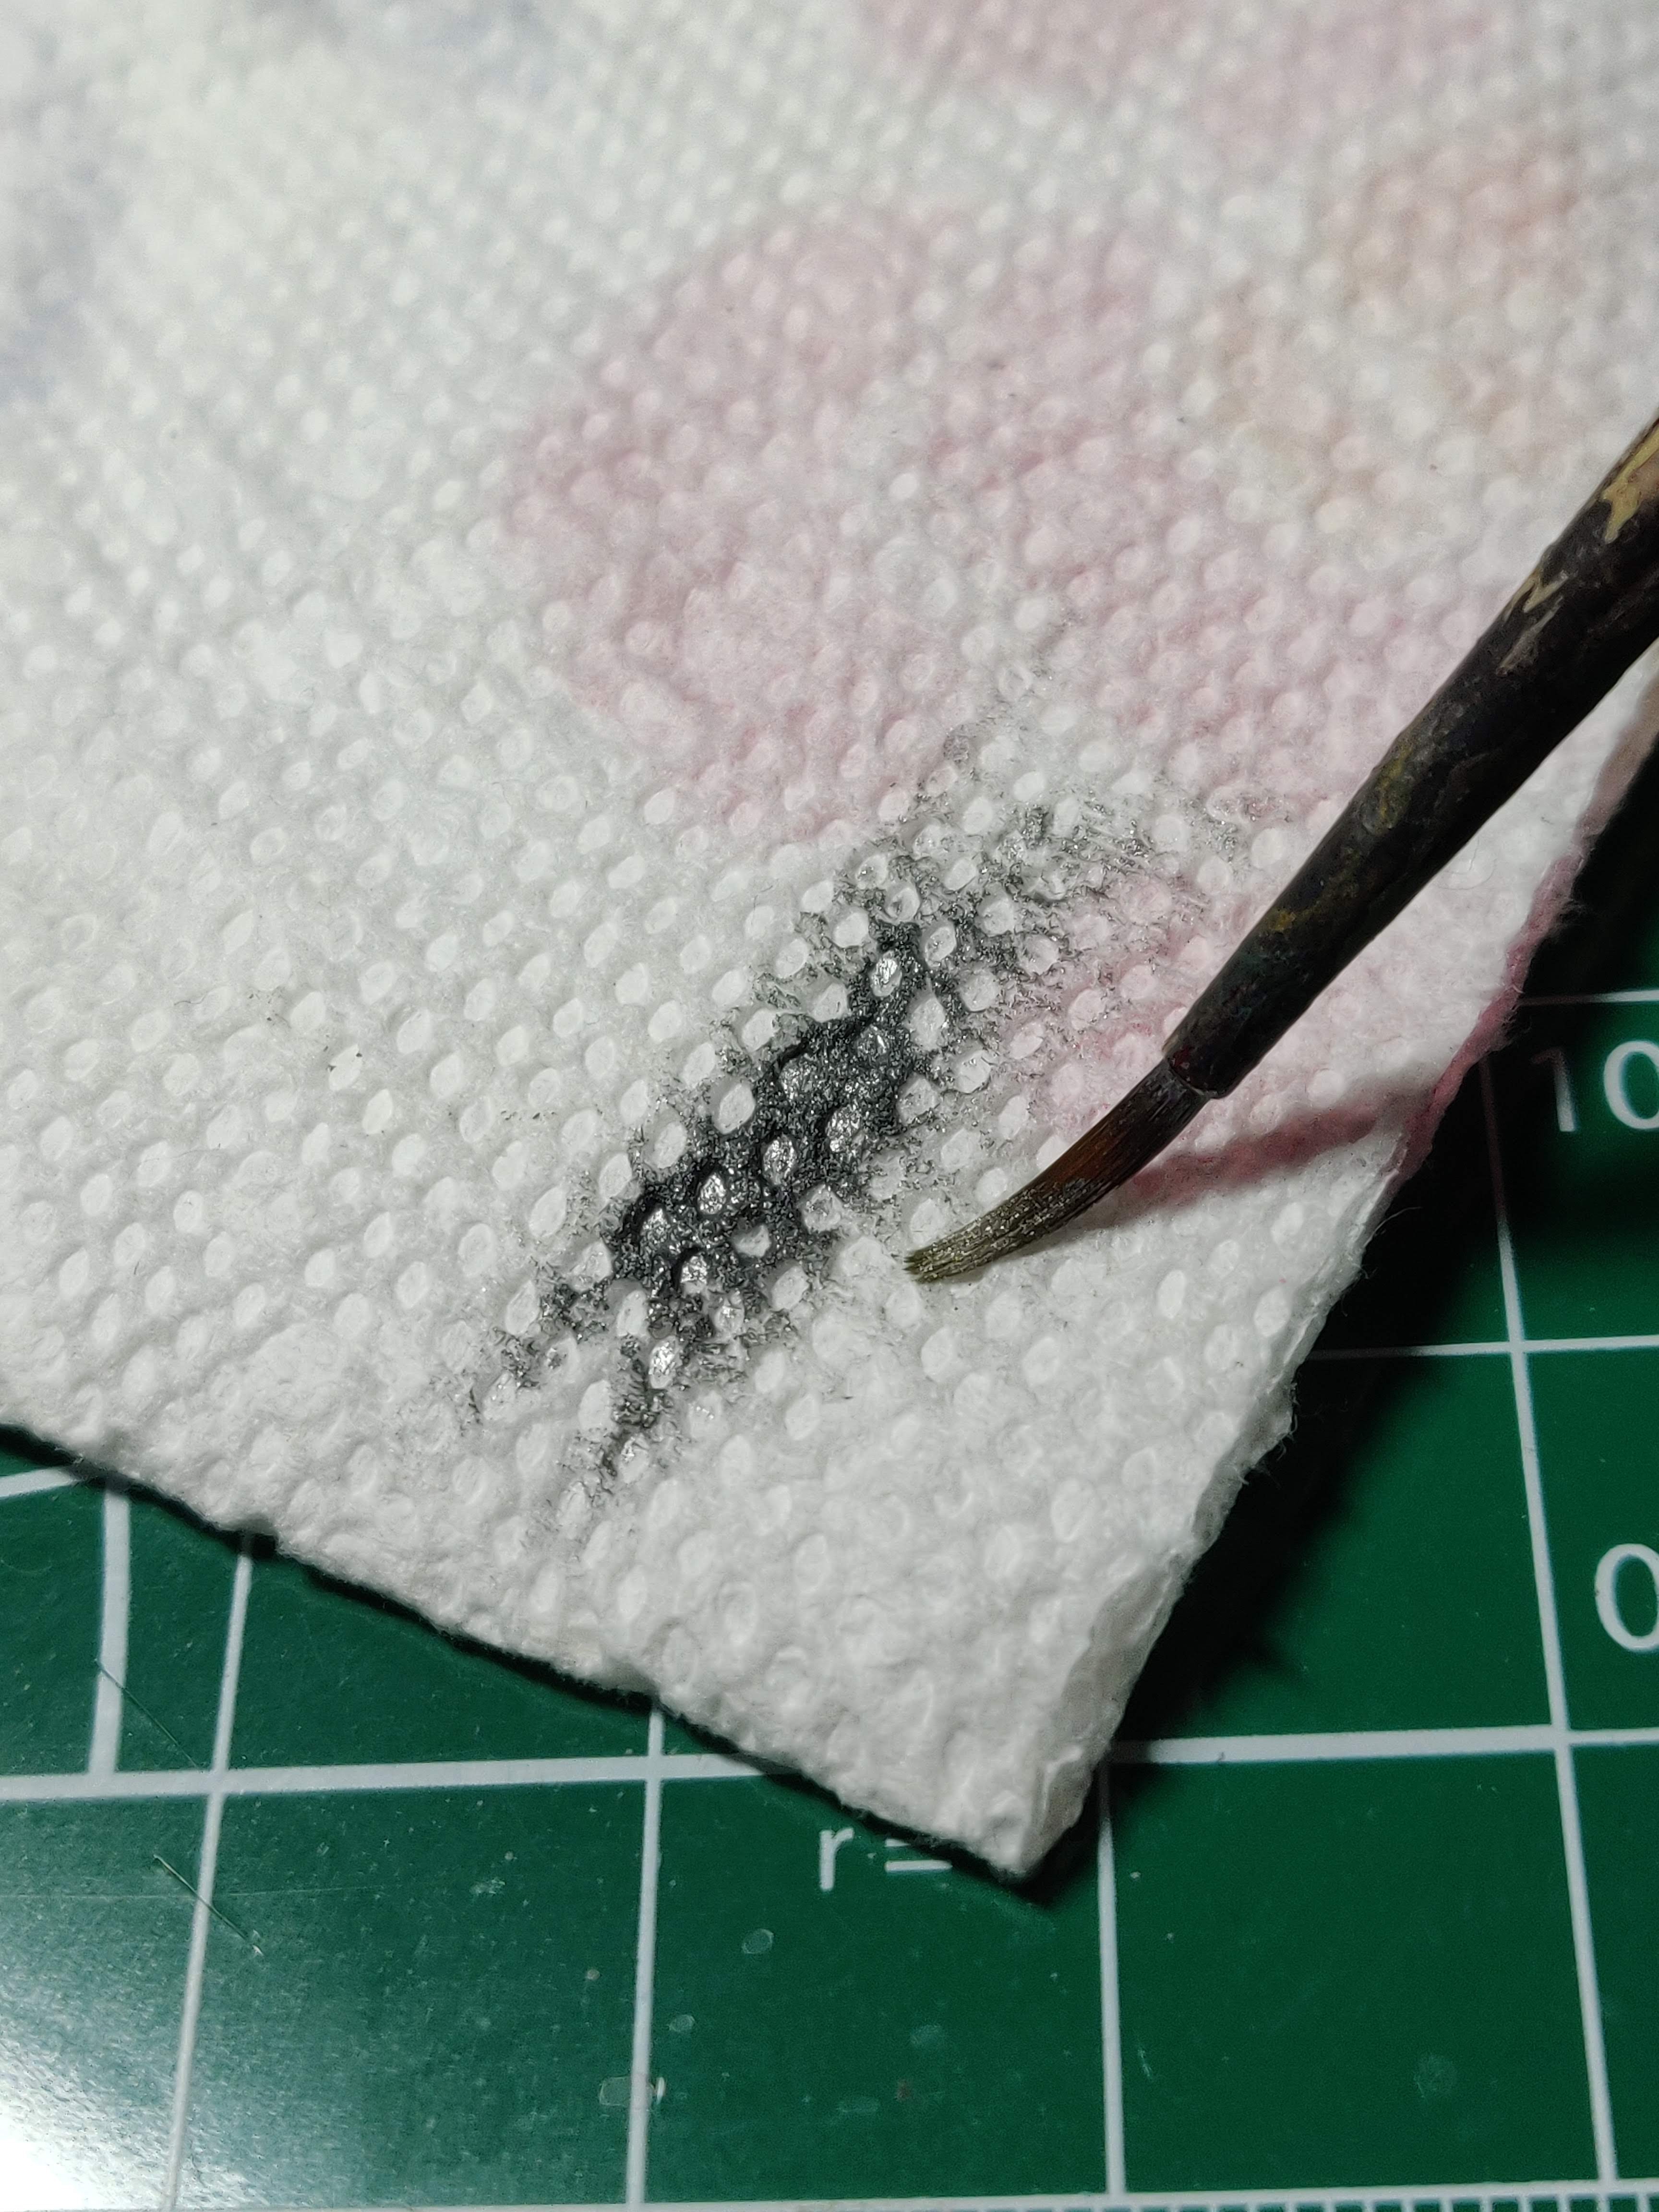
In the photo you can see where I’ve loaded my brush with silver paint and wiped it until nothing really comes off on the towel, but there are definitely flakes of metallic pigment left on the brush. This is more than enough to put color on a figure, as you’ll see.
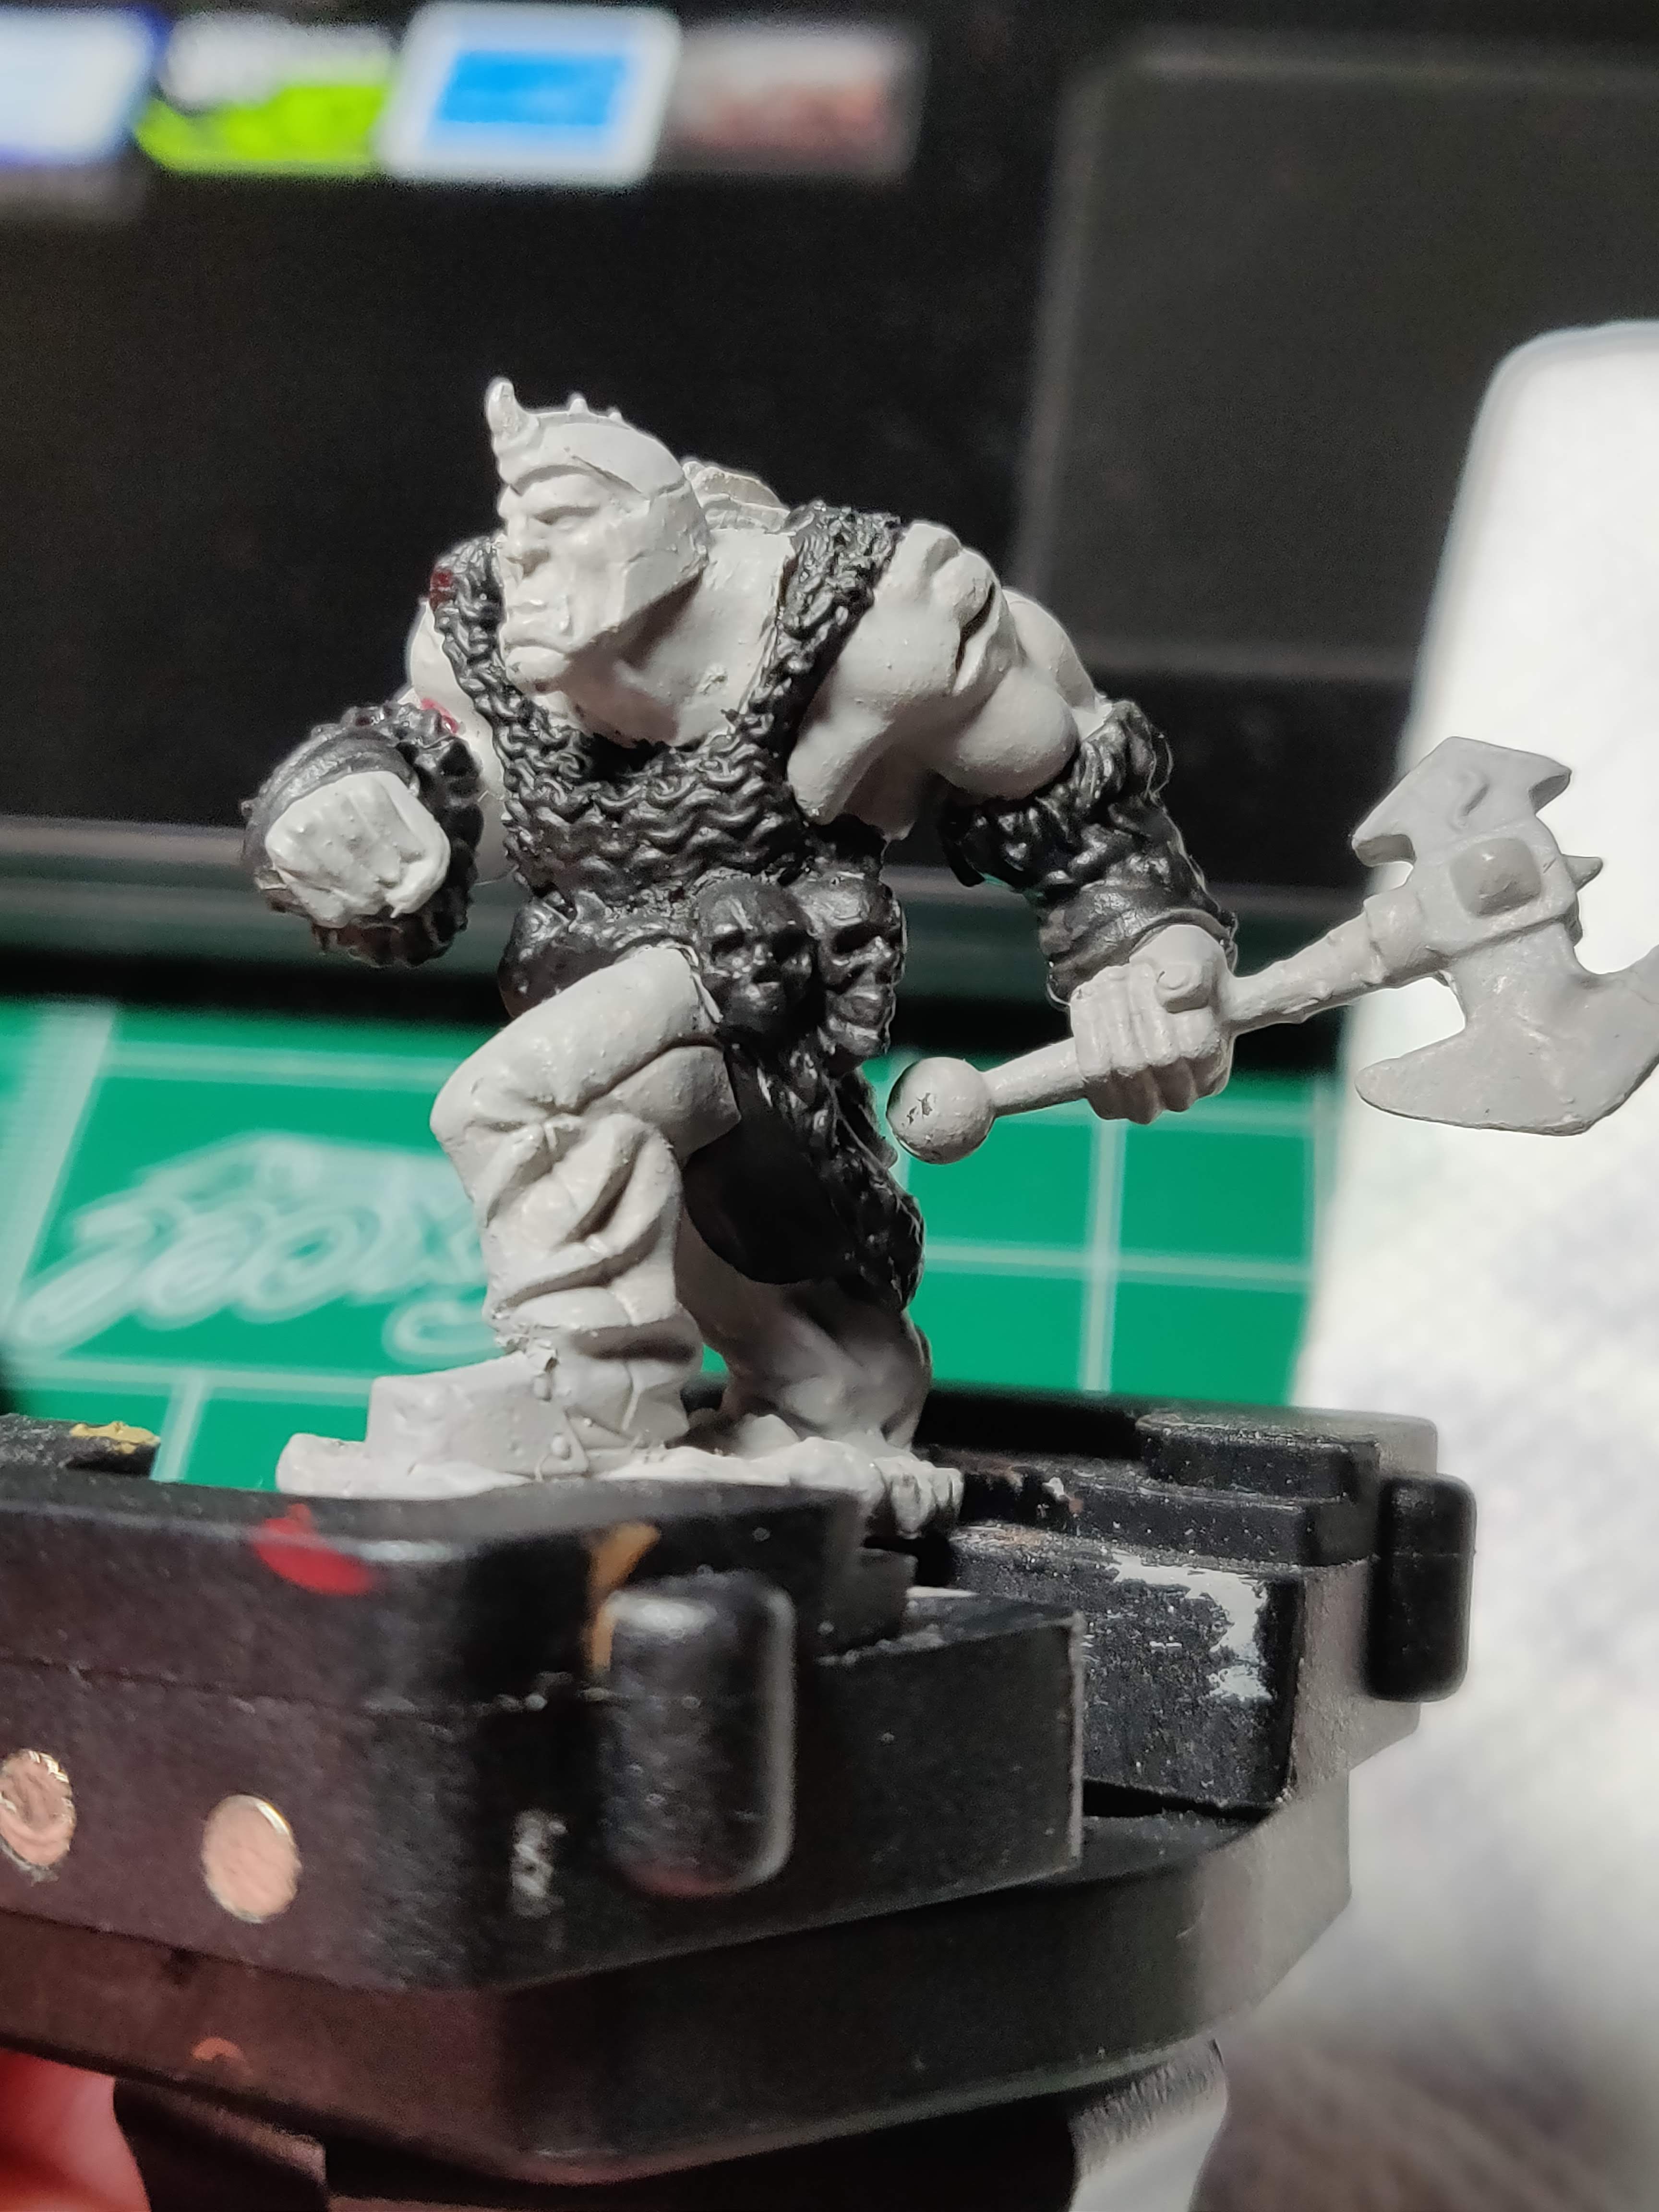
Drybrushing also is most effective when there is a stark contrast between the primer coat and the drybrush coat. You can see below where I’ve basecoated the mail and the fur in black, so the pigment will stand out and create more depth.
To drybrush the figure, just take your brush and draw it back and forth across the texture. You’re going to work perpendicular to any apparent “grain” the texture has. You’re also going to want to put a decent amount of pressure on the brush to ensure the pigment transfers. One thing to note: this will absolutely destroy your brushes. It’s best to relegate this technique to older brushes that are getting close to the end of their use life. You can get brushes that are specifically designed for drybrushing (like this one from Citadel, or this one from Army Painter), but full disclosure, I have not used them. I tend to rotate my brushes into drybrushing duty, but as I’ve started using better brushes (and taking better care of them), I have fewer and fewer that are suitable for this kind of heavy abuse, so I’ll end up picking up one or two before long.
Here you can see what a finished drybrush basecoat looks like. All the raised detail is picked out by the color, and the recesses have stayed black. You’ll notice there’s a bit of “overspray” along the edges where I’ve hit the areas around where I’m painting. That’s why you want to do any drybrushing first; you’re going to end up painting outside the lines, but if this is your first step in the process, it’s easy to clean up when you move on to the other areas. Just hit the spots with your primer, and you’ll be all set.
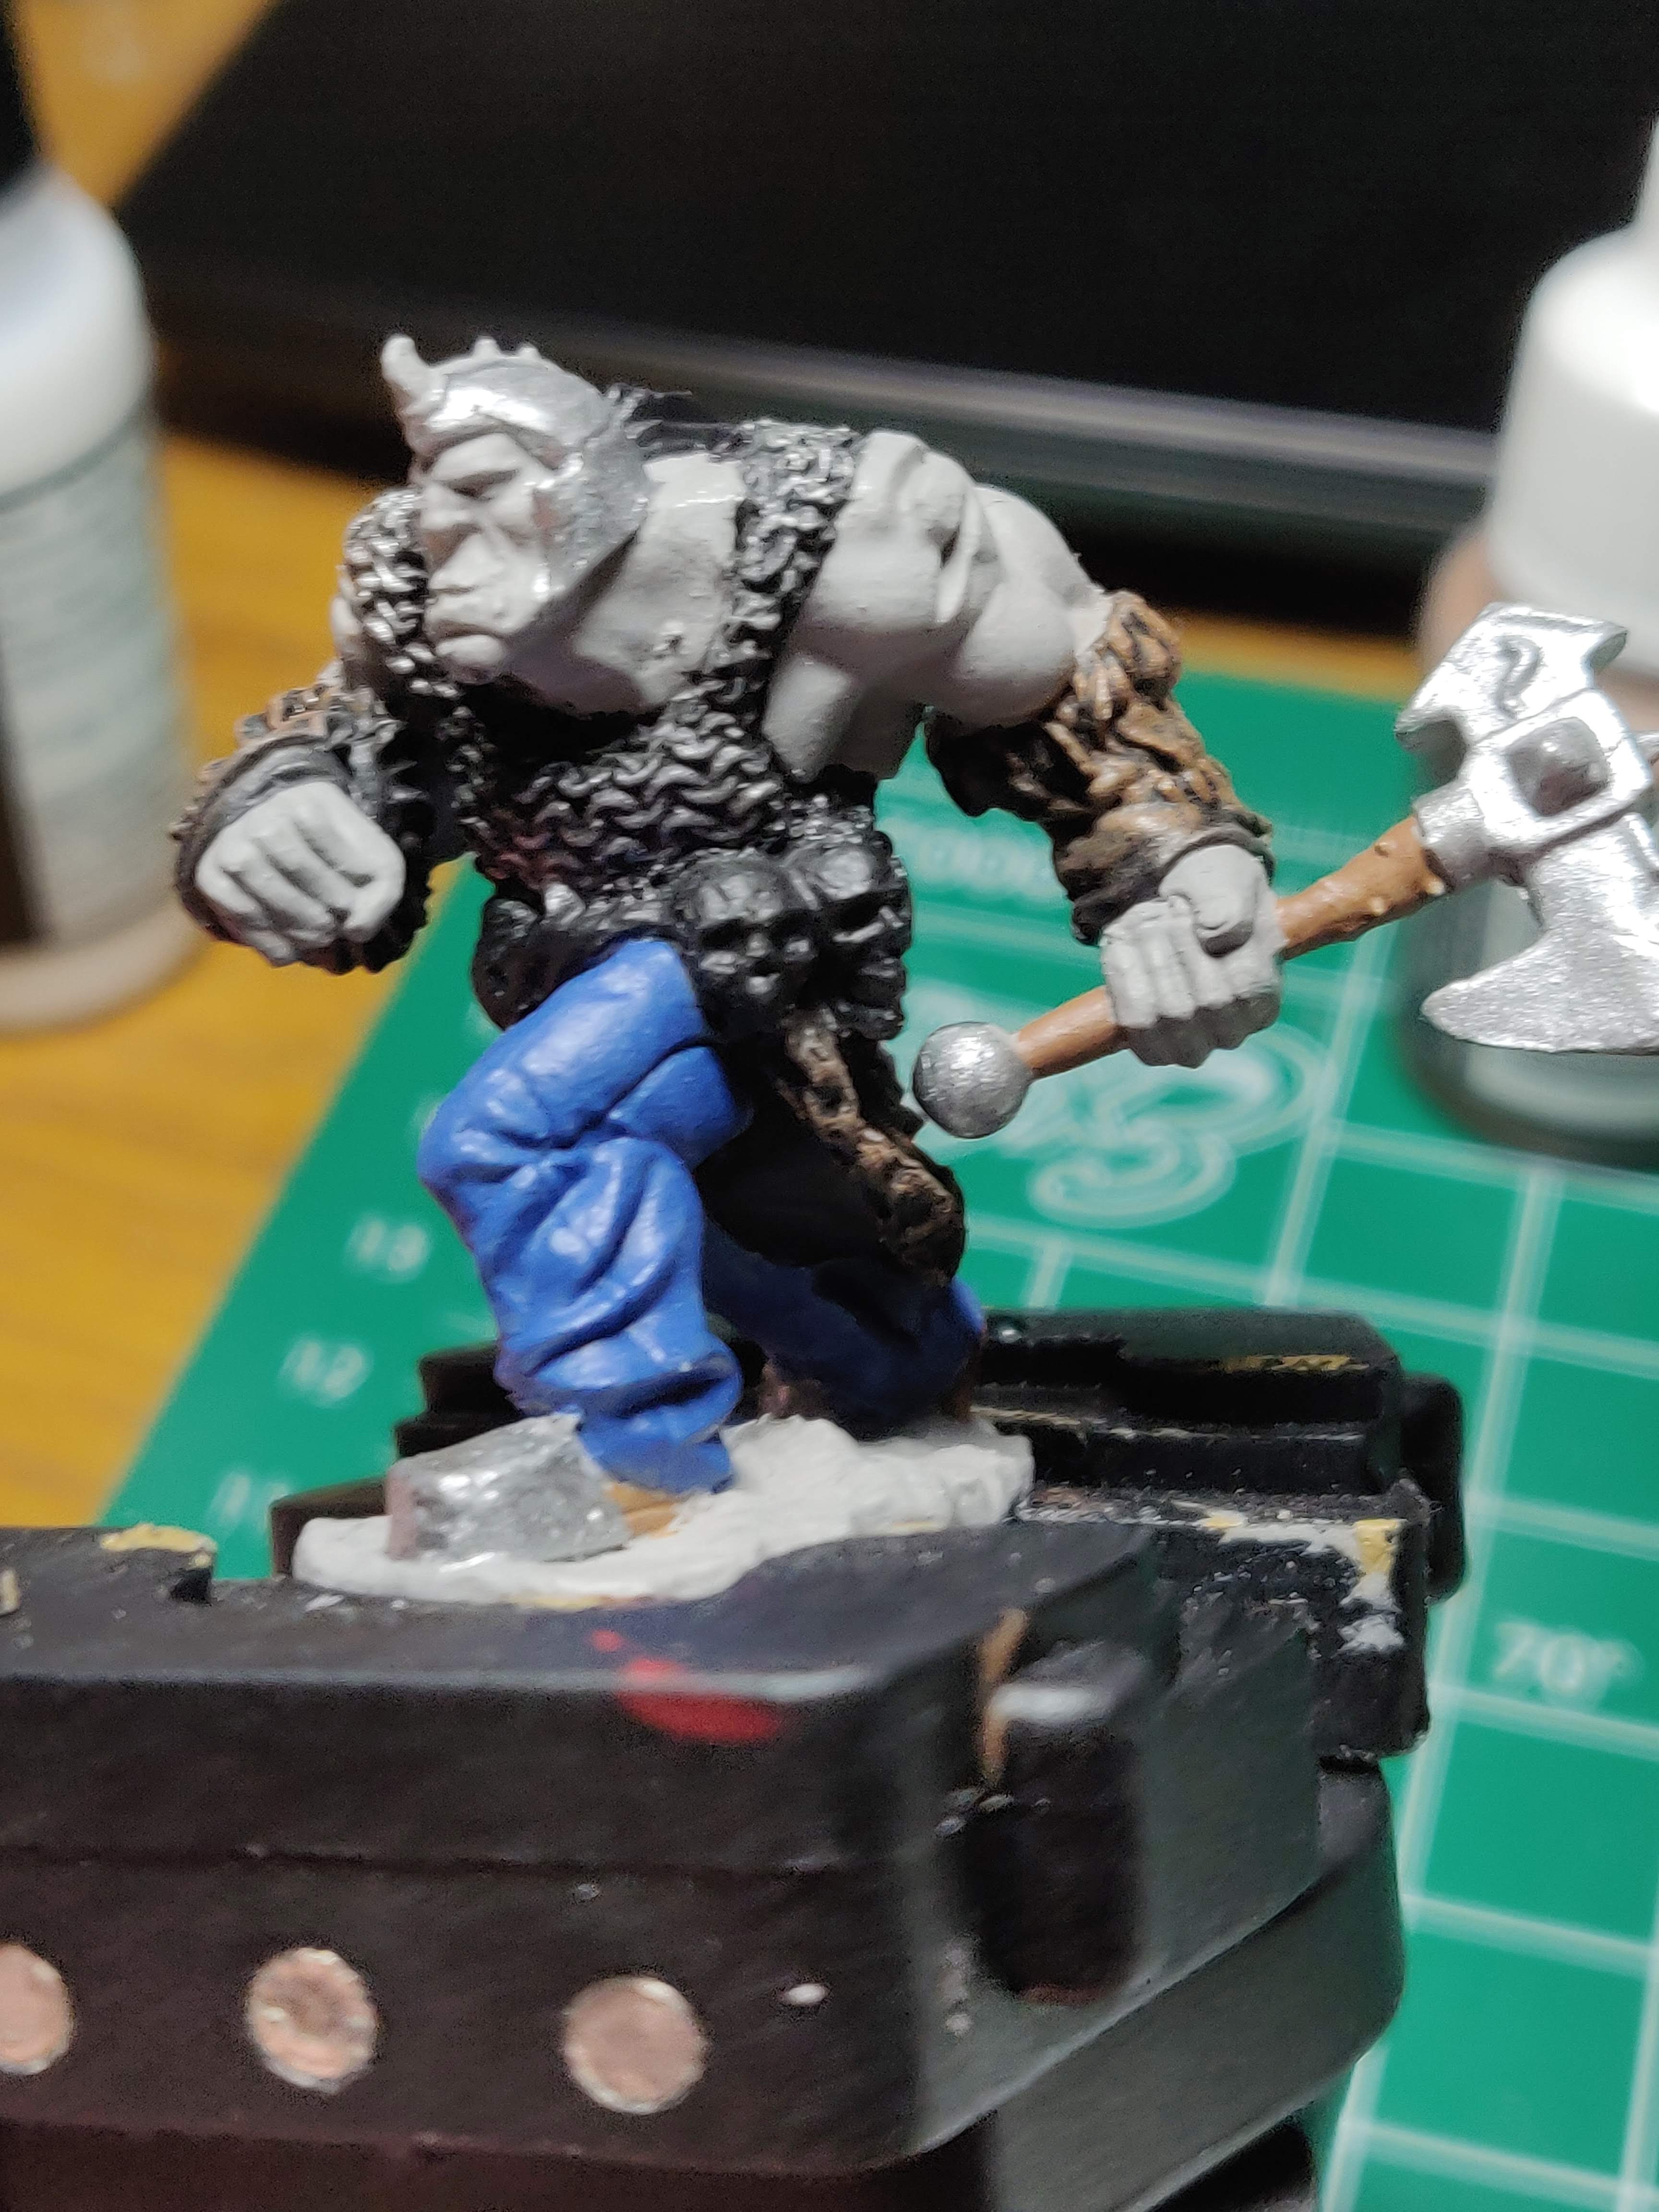
At this point you can finish putting the basecoats on your figure like you did for Nienna and this guy’s buddy. I like grey orcs, so I’ve left the primer coat again. The large flat areas of metal will look best with a wash, like the other orc’s armor plates.

As you can see by my helpful notes, I’ve applied a wash, and will highlight the rest of the figure just like I did in the previous posts.
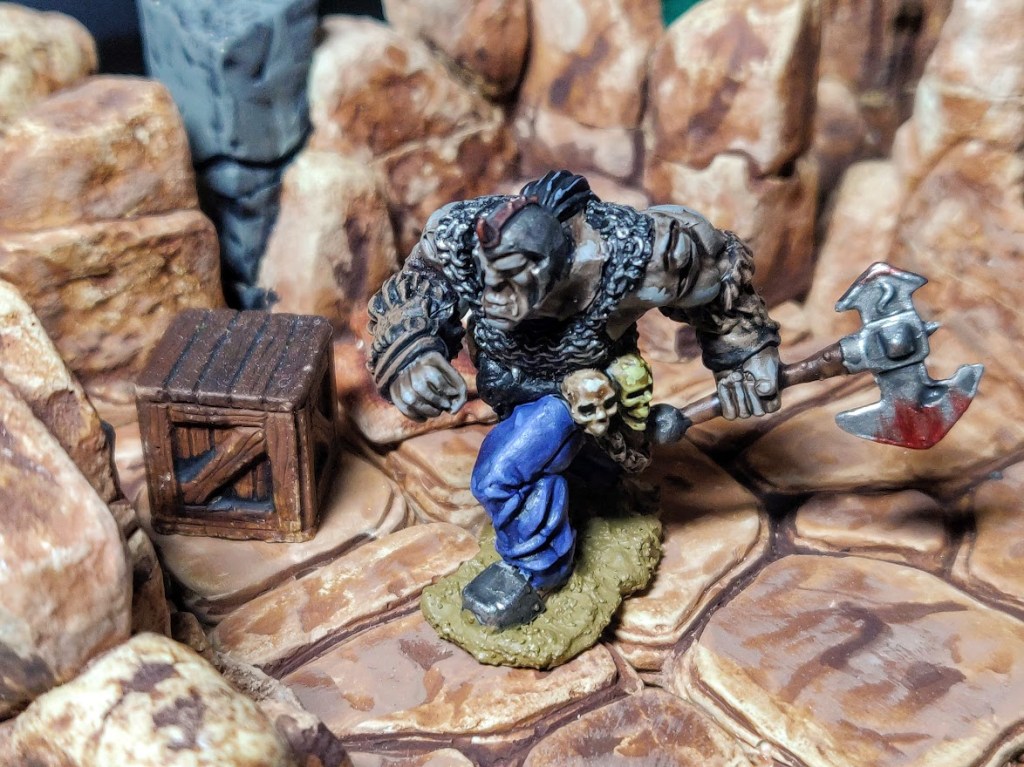

And here you can see the finished product. You can see the detail on the fur and chain. I went up one level of highlighting on the fur, but left the chain as is. And that’s the basis of drybrushing. It’s a simple technique, but one you can get a lot of mileage out of. One thing to watch out for is that it can end up looking a little chalky if you overdo it, so be careful how you build the layers. Once you get the hang of it, you’ll find it’s a quick and simple way to really bring out a lot of nice detail in your figures. I used Mithril Silver, Bugbear Brown, Abyssal Black, Astral White, and Kraken Blue from Army Painter’s Adventurer’s Paint Set for this guy.
As always, if you click on a link for a product in an article that takes you to Amazon, buying it will send a little bit my way. It won’t cost you any extra, but it’ll help keep the blog going. Thanks!
