So we’ve painted a hero and we’ve painted an enemy. Both had things to teach us about the basics of painting, and now we’ve got something new to look at: color palette.
We talked about this briefly with Nienna and the Orc we worked on, but those color choices were not necessarily the first concern; Nienna was chosen to work with a basic starter library of paint, while the Orc was chosen to showcase how coordinating your wash color to your paint choice can add vibrancy to a model.
(As always, I’m part of the Amazon Affiliate program, so if you buy anything via the links I’ve put in the articles, it will give me a small cut, but it won’t cost anything extra for you. I try to only link to products I’ve used directly, or ones that I have heard favorable things about.)
With the Rust Monster, we’re going to look at how to choose your palette with the figure itself in mind, and how you can achieve an incredibly vibrant and eye-catching result with only a few colors. We’ll also talk a little bit about how your original idea for the model might change as you work, and how that’s perfectly fine!
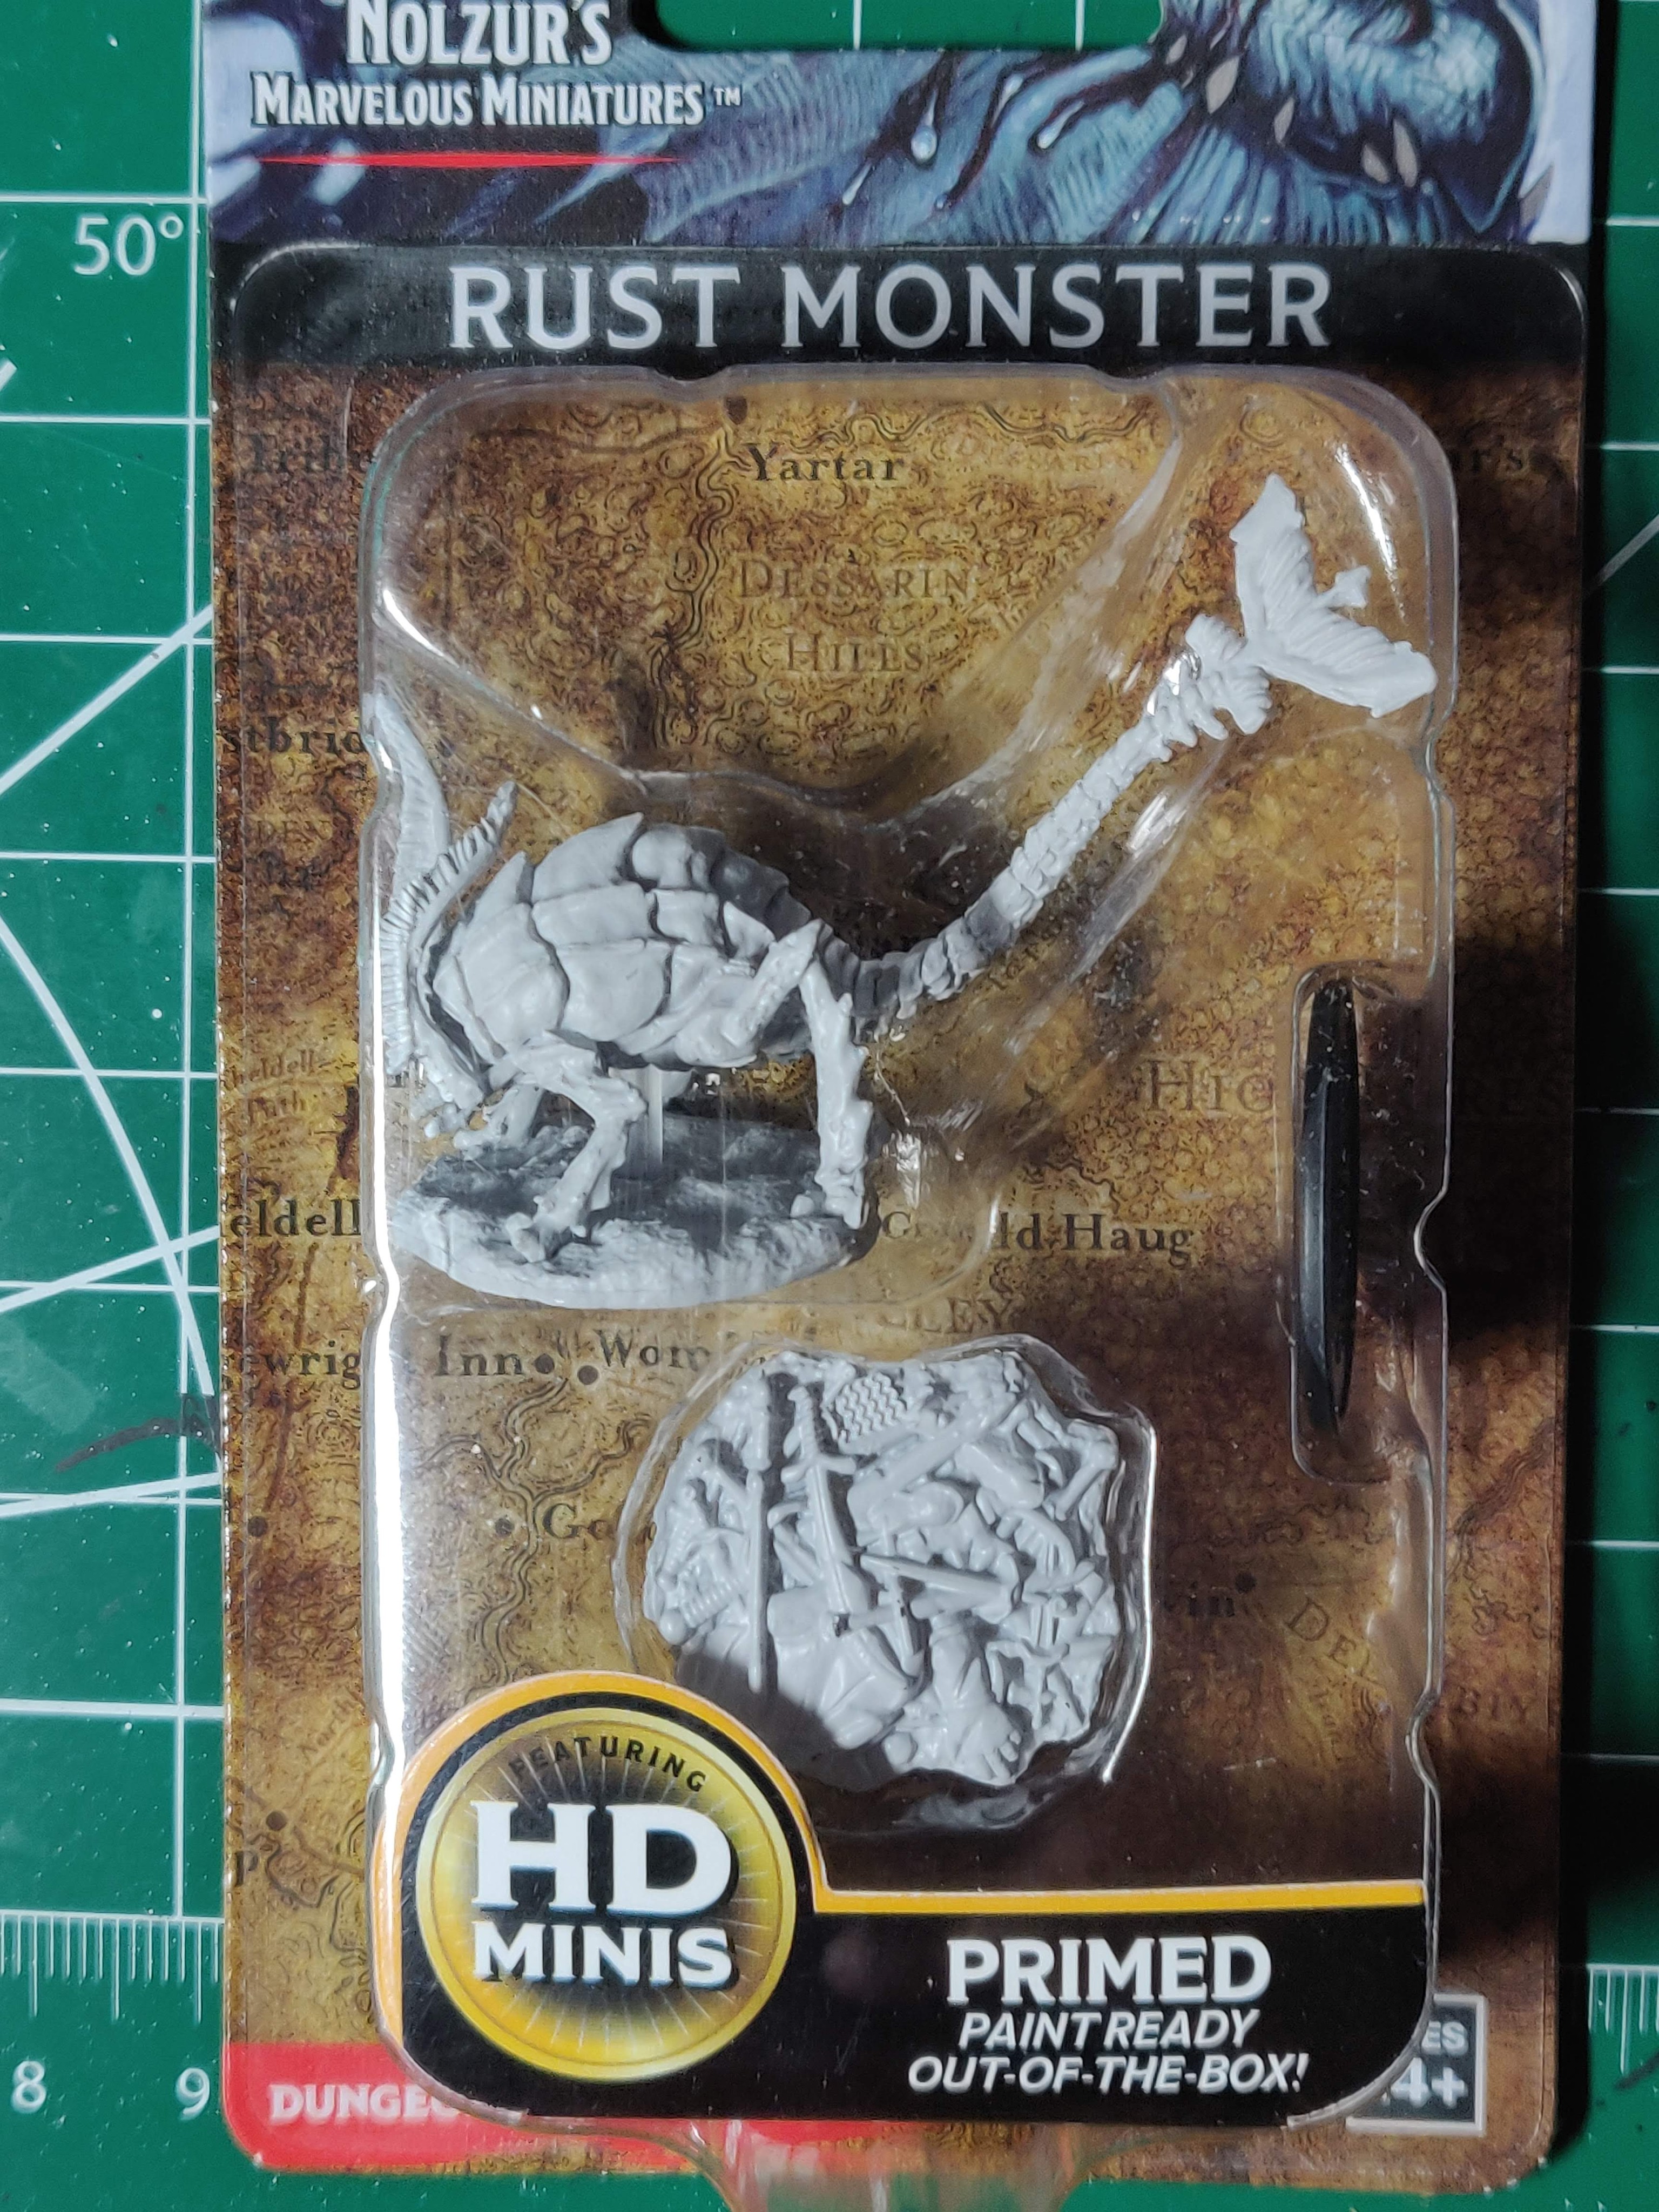
The first thing I looked at with this model is what, exactly, it was. Rust Monsters are classic Dungeons and Dragons monsters, having appeared in every edition since the original Brown Box. They’re large insectoid creatures that have corrosive antennae, which they use to immediately oxidize ferrous metals and then eat the resulting oxidation. They literally eat rust. One presumes that they can feed on any metal that is prone to oxidation, but the 5E rules specifically state they seek out ferrous metals, although the rules don’t specify if bronze weapons are immune to it’s corrosion ability. This is actually important, as it’s precisely this ability that we’re using to inform our color choices.
If you look at a picture of rust, you’ll see many different shades: reds, browns, and oranges are the most common. Given this variance, I want to choose colors that will give me the range of what rust can look like, while also looking like a more-or-less naturally occurring wild animal. I want a base, a nice mid-tone, and a brighter accent to make it pop. Going through my paints, I decide to go with the following:
The Charred Brown is a nice dark basecoat that will cover well and give us a nice, rich foundation for the Terra Cotta. The Scrofulous Brown is a brighter, more orange tone that will be a nice accent without being a bright unnatural orange, and the Red Tone will bring everything together with a nice, rich wash. These colors are all very similar, but varied enough that they form a nice triad (although maybe not the traditional shade-base-highlight sort). At this point, I also thought I’d be using a metallic to drybrush some highlights, but as you’ll see, I abandined that idea once I got started. All of the Vallejo paints I went with can be found individually, or in the Vallejo Game Color Basic Paint Set, which I highly recommend if you plan on making this a serious hobby.
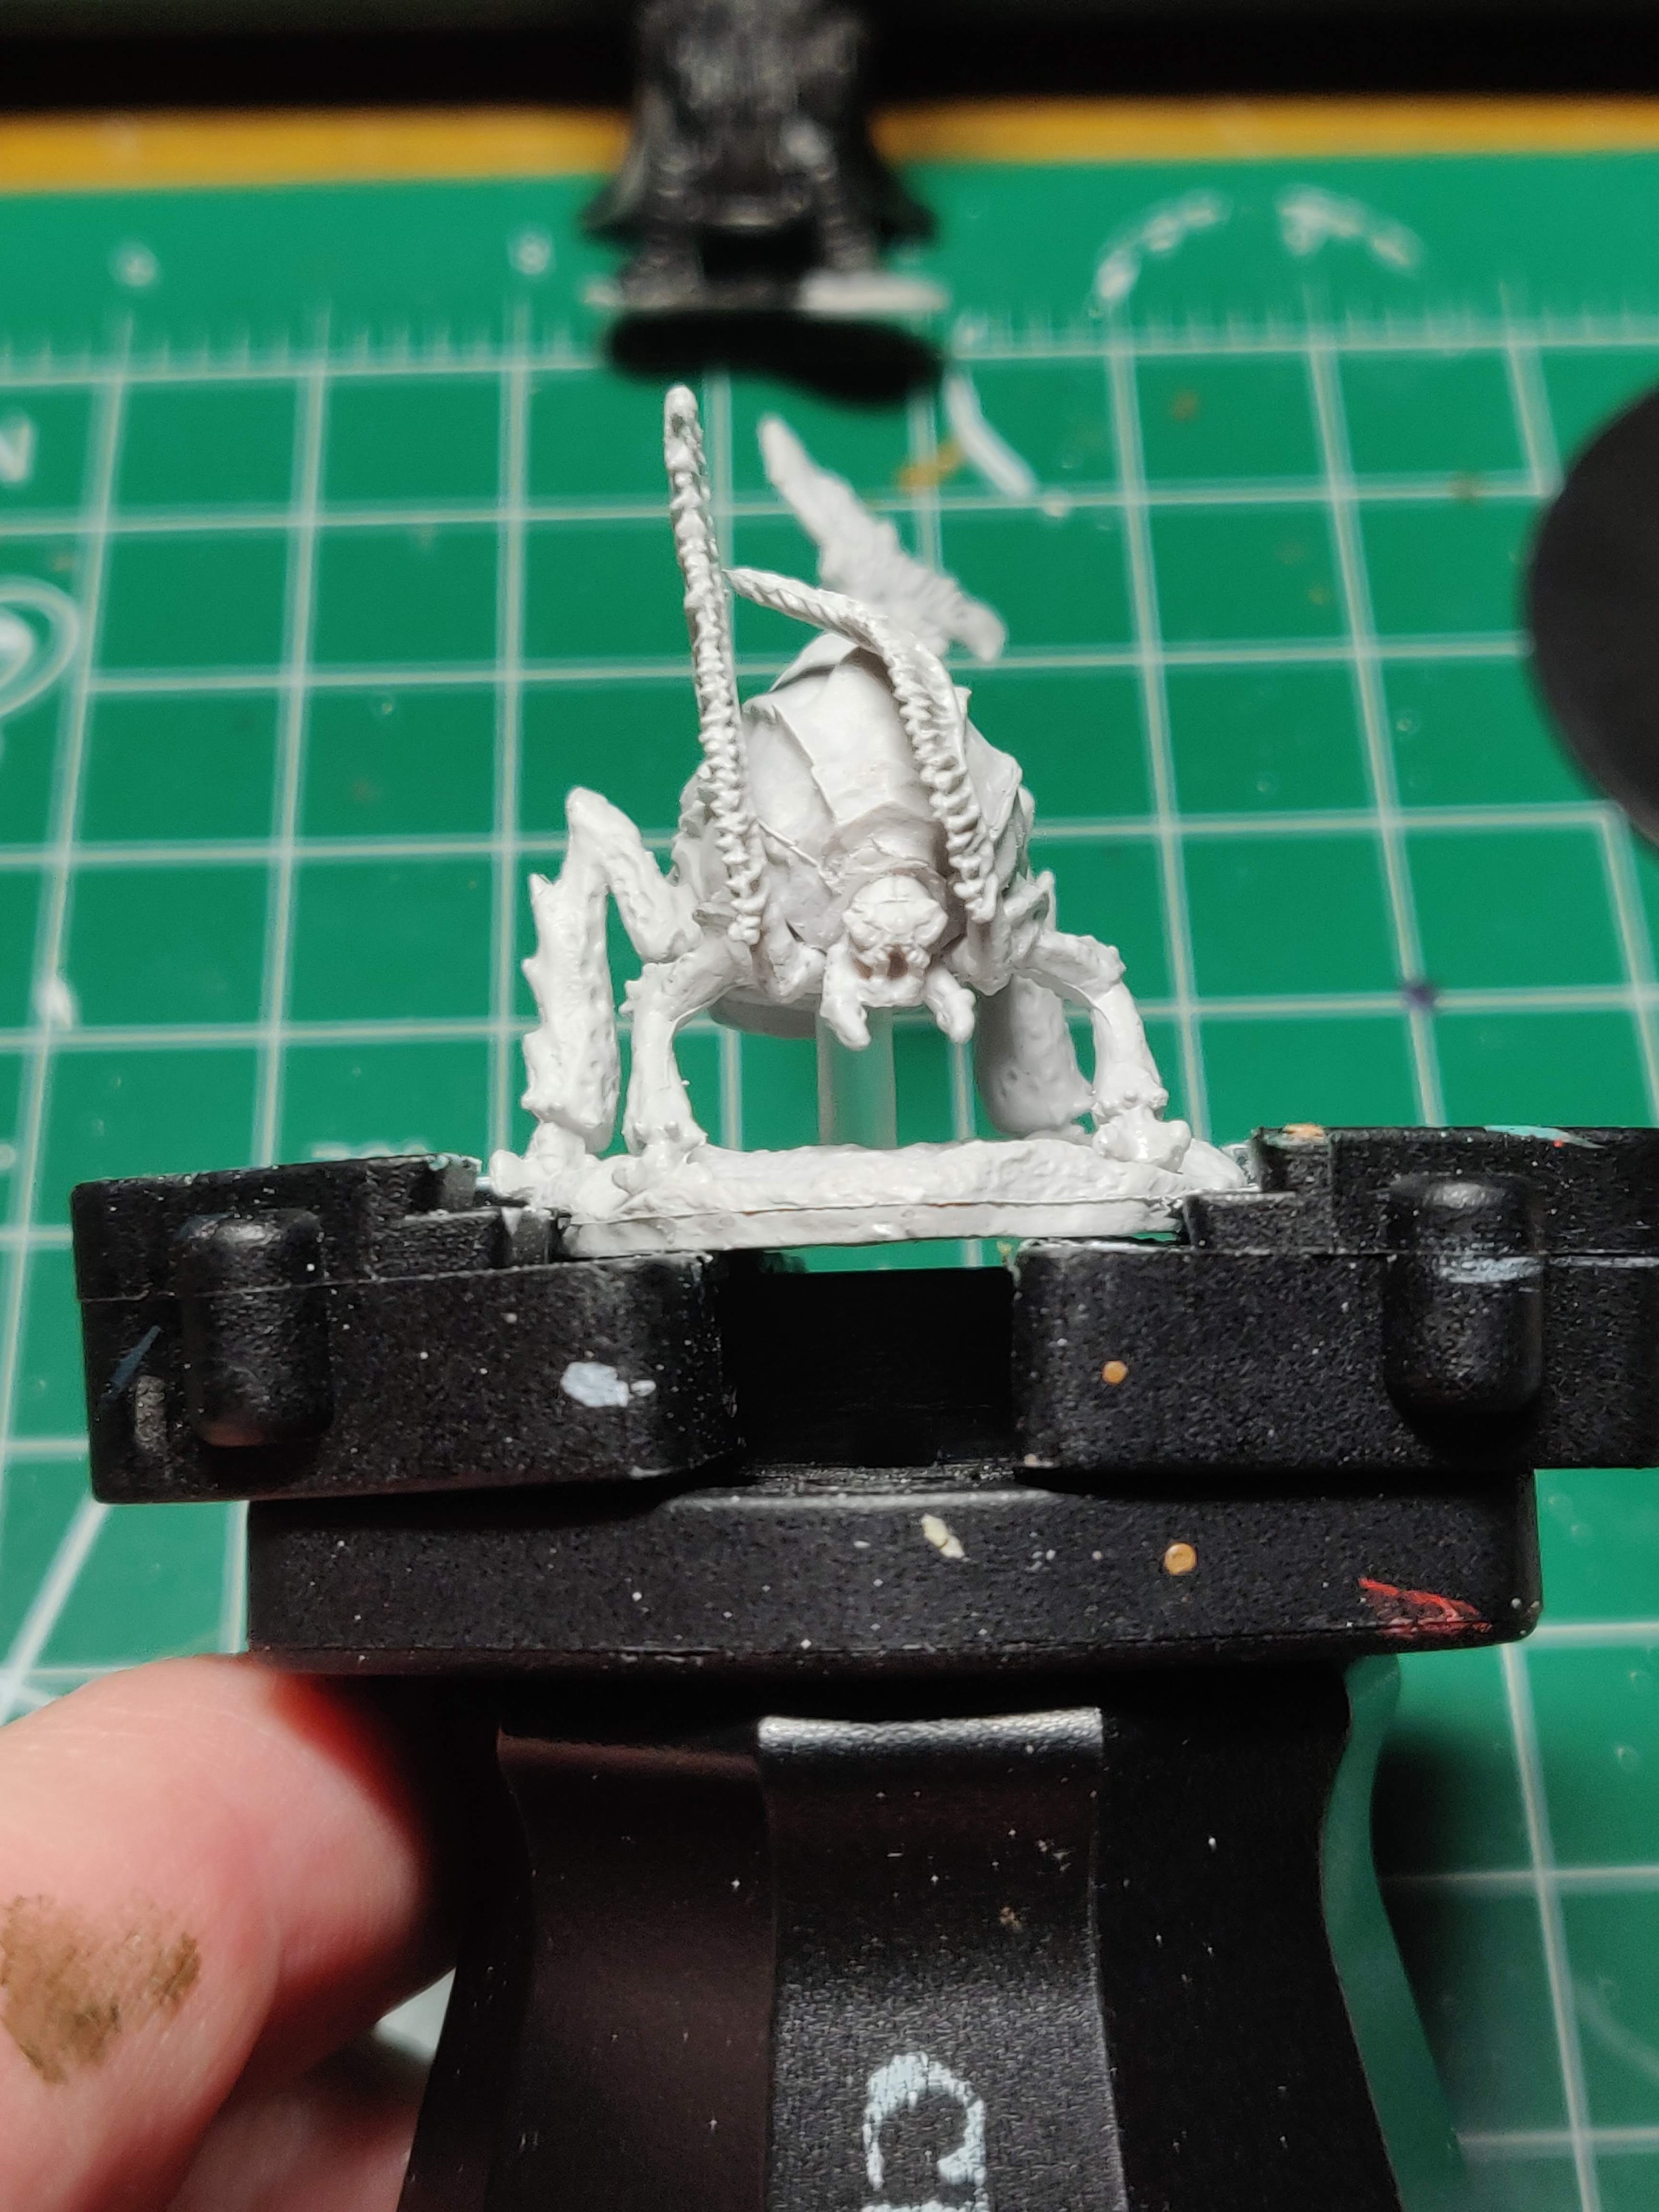
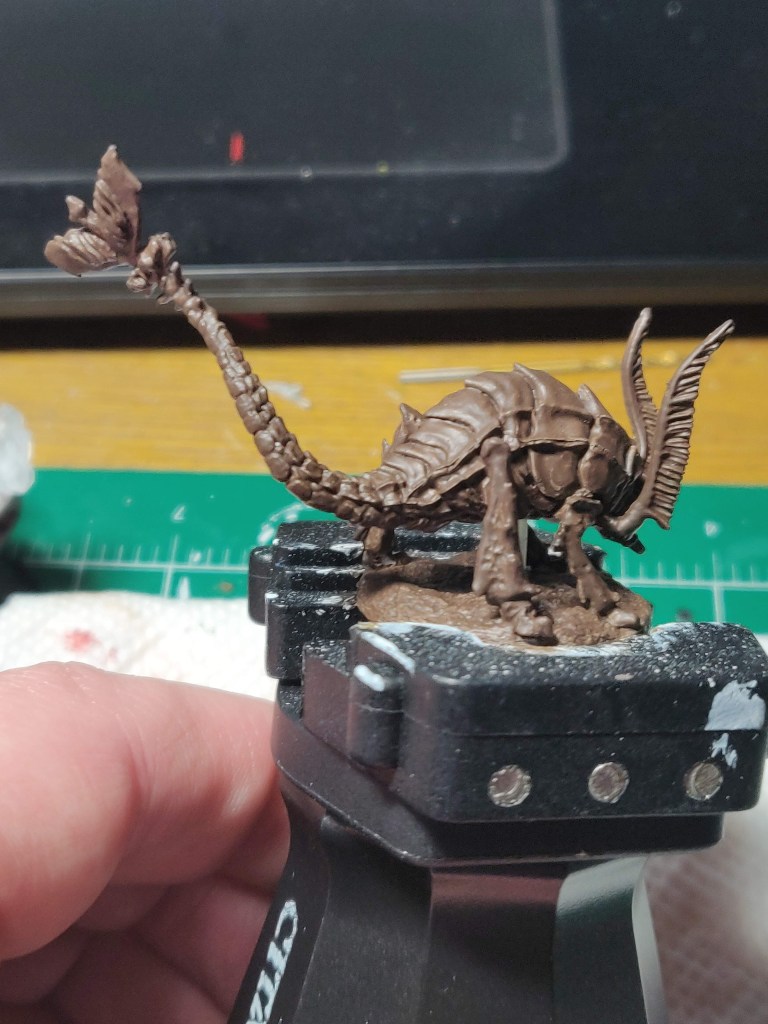
First thing we notice with our little friend is an antenna that’s bent in an odd way. This is easy enough to fix. Dip it in boiling water until it’s malleable, then dunk it in ice water while holding it in place. This will relax the plastic and then harden it so it will retain its new shape.
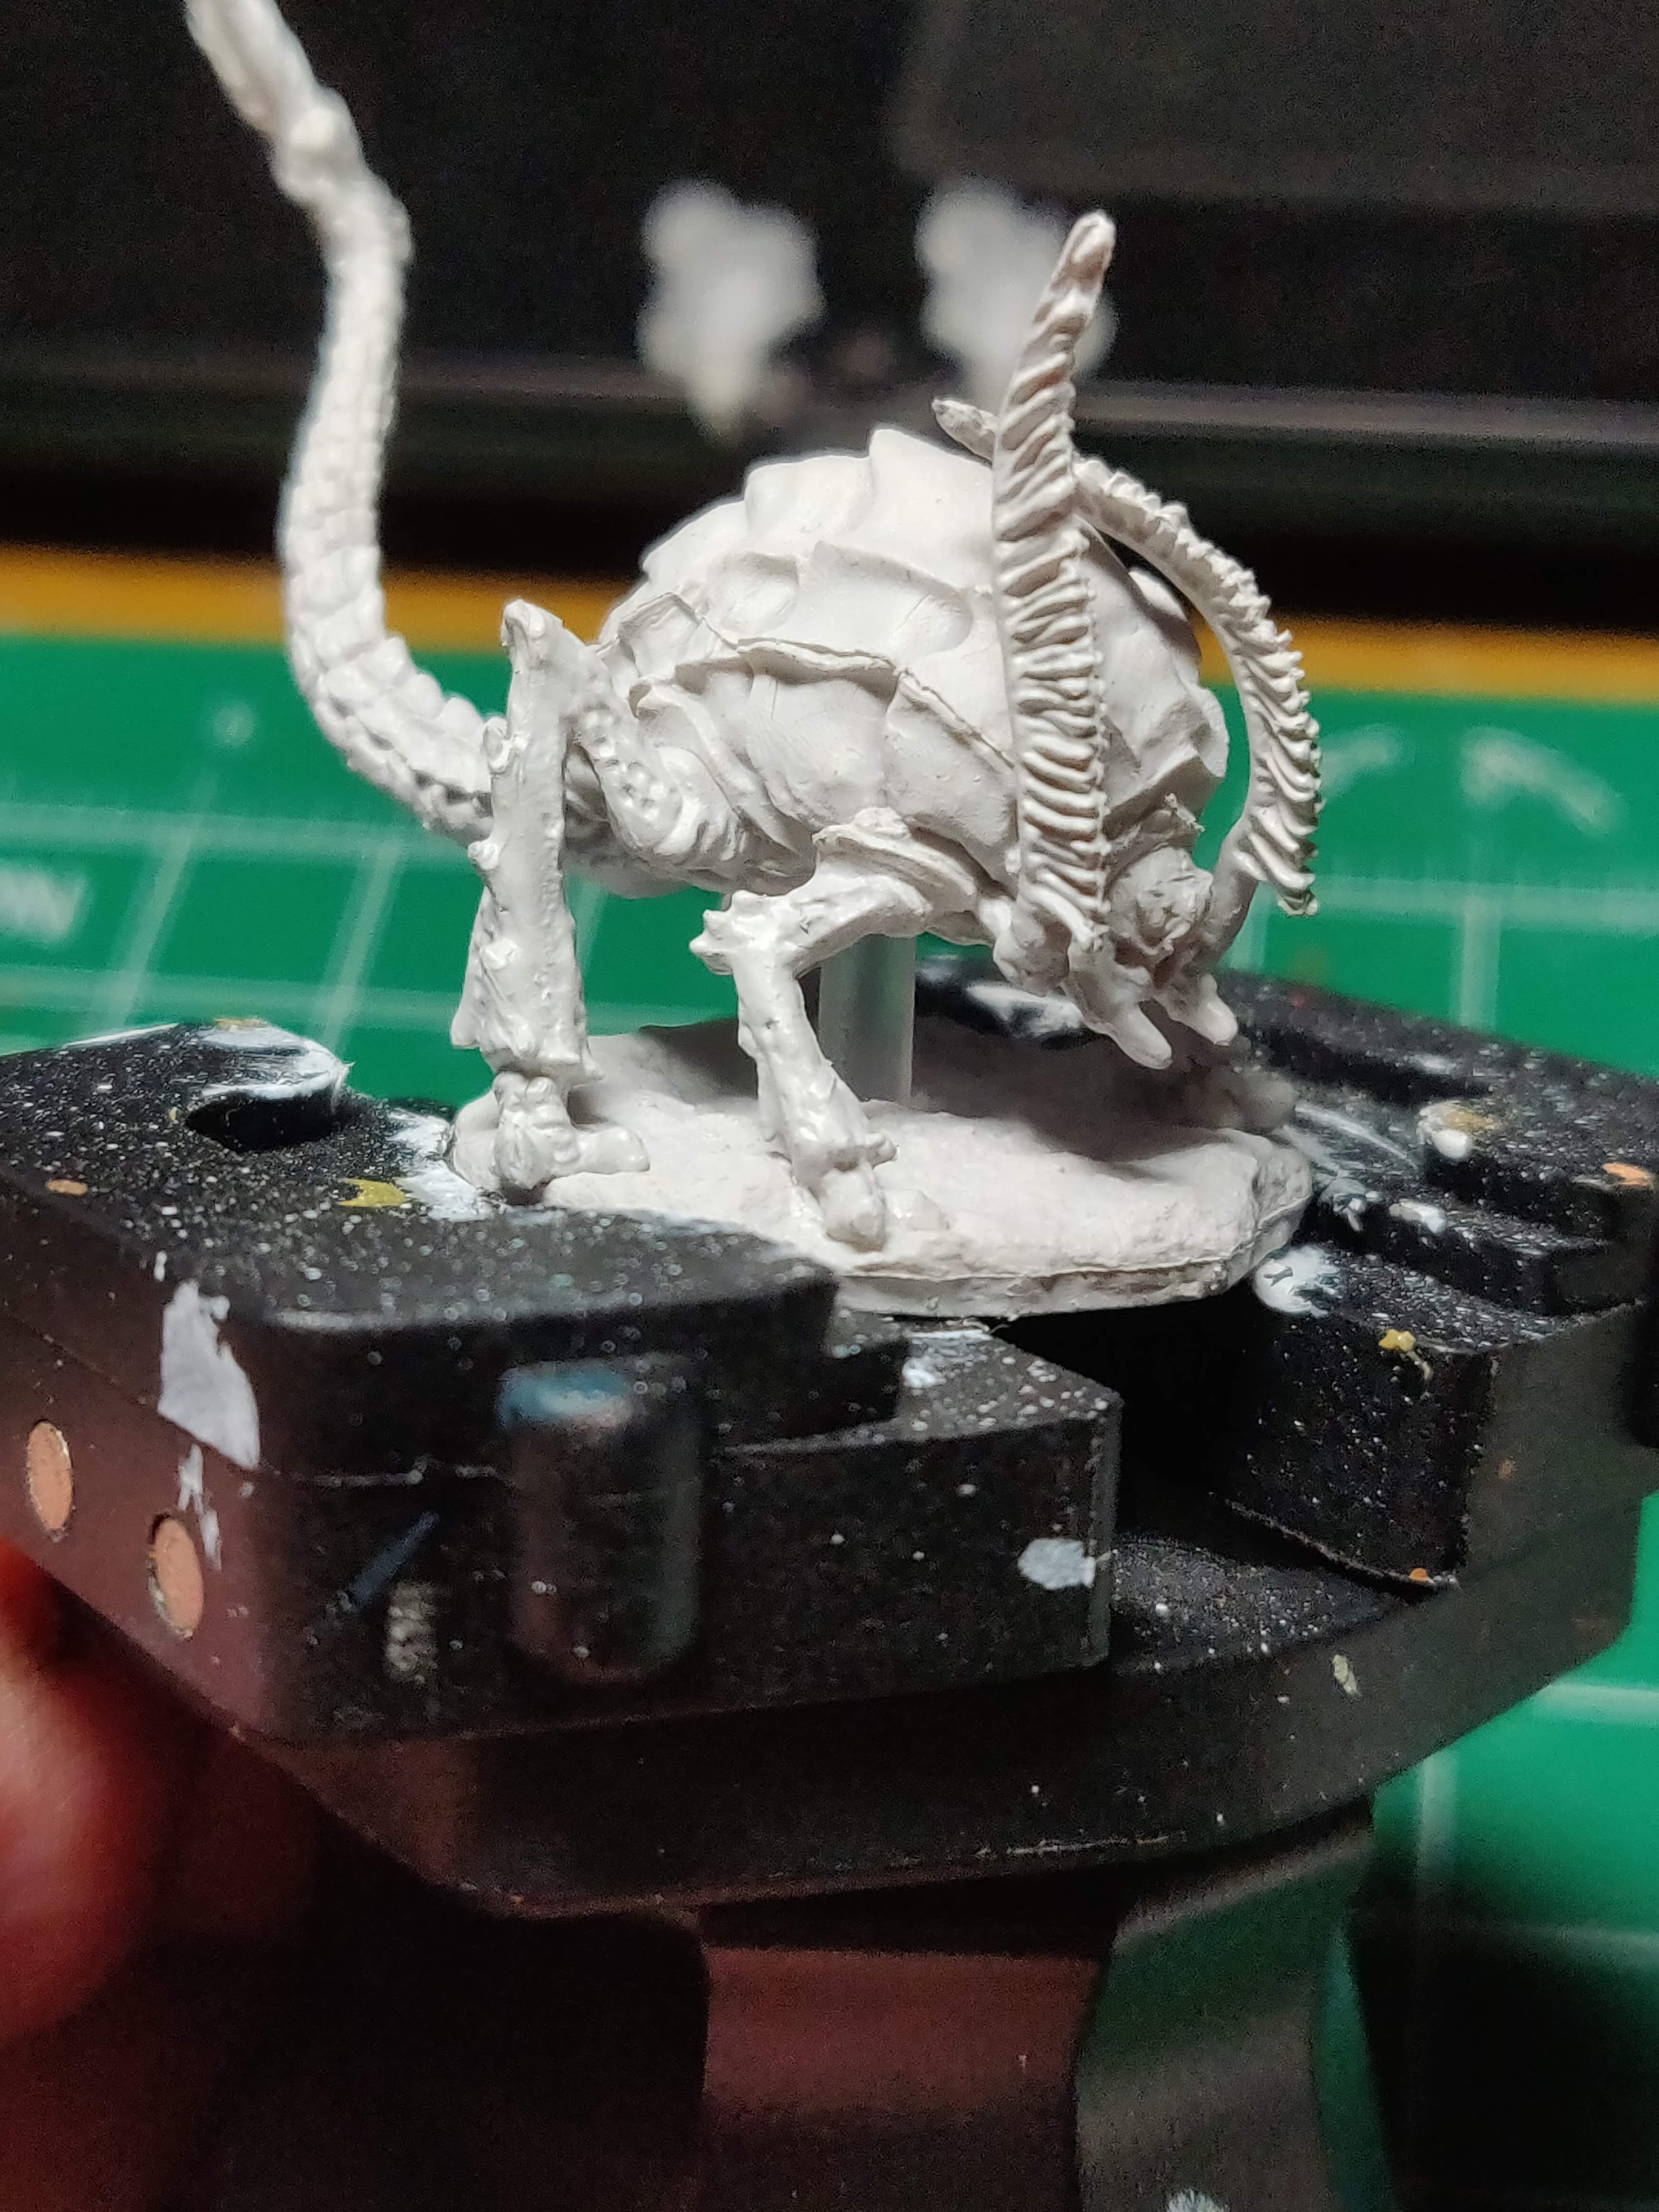
We’ve got a little mold line on this side, but it’s easy to clean up with an X-acto knife or cleaning tool. I actually left it in place because it’s not terribly noticeable, and one of my themes with the Wizkids and Reaper Bones figures is trying to keep them as close to painting as-is as I can, mostly to illustrate that you don’t need to get bogged down in minutiae before you can get these guys on the table.

Here you can see the straightened antenna. For the basecoat, I just thinned the Charred brown and covered the whole figure. Painting the base the same color will unify the whole model once the mid- and light tones are finished. At this point, just go nuts; there’s no reason to be neat or careful. You want the paint to cover the whole model.

There’s a lot of good detail on this figure, and you can see that even with the dark basecoat, it’s really standing out. The big plates have nice ridges, and the legs have some nice chitinous texture.


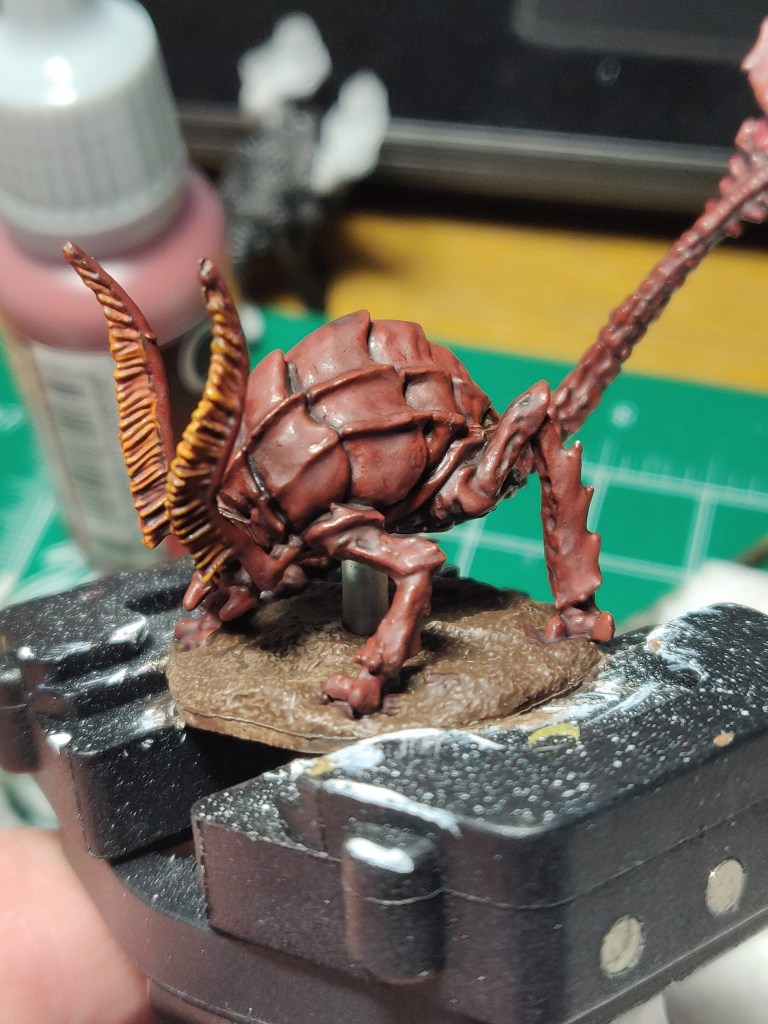
And here we’ve added the Terra Cotta to the main body and Scrofulous Brown to the antenna and what we can reach of the underside of the monster. We’ve left the Charred Brown in the deepest recesses. Usually these recesses would be black, but I wanted a more natural look for this model, which would tie it into the color palette I’m using. Brown will help unify the figure while still deepening the recesses.

Once we hit it with the wash, you can see how much it brings everything together. Red Tone is a nice choice for this because it’s a good deep red, but if you want a less saturated look you could go with a brown or sepia. Army Painter’s Soft, Strong, and Dark Tones would be good choices if you want to go with a more earth tone for your wash, since they skew to the brown. Vallejo’s Smokey Ink is another good option, as is Citadel’s Seraphim Sepia (which looks like a return of Gryphonne Sepia!) and Agrax Earthshade. Basically any red to brown ink is a good choice on this figure.
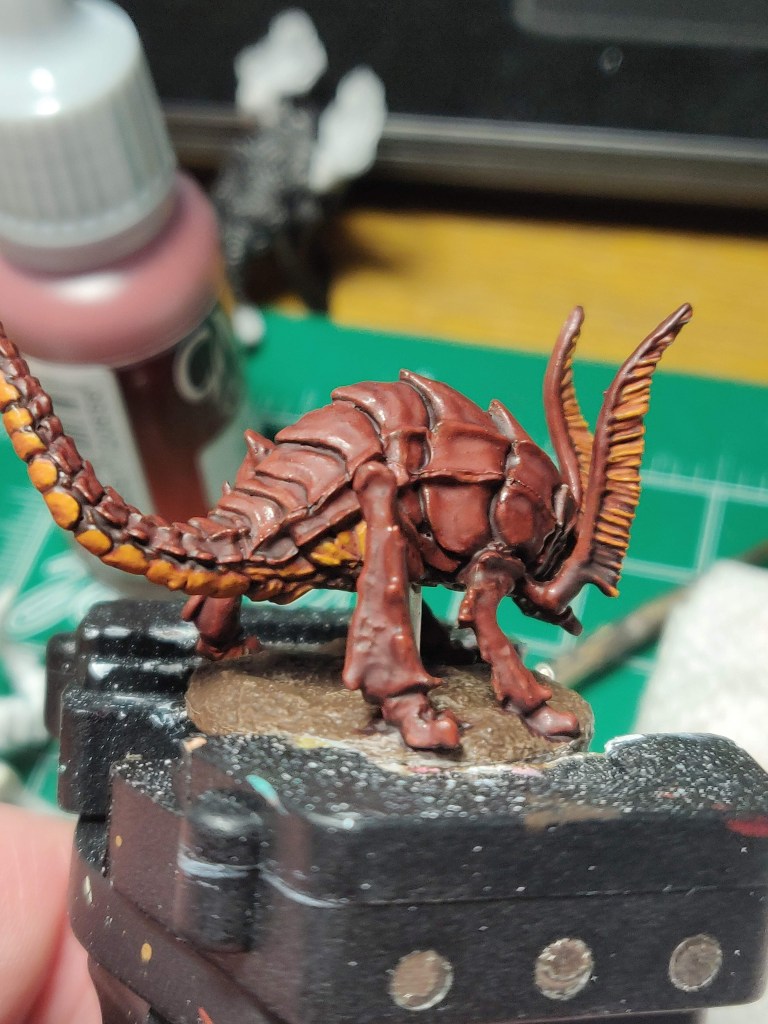


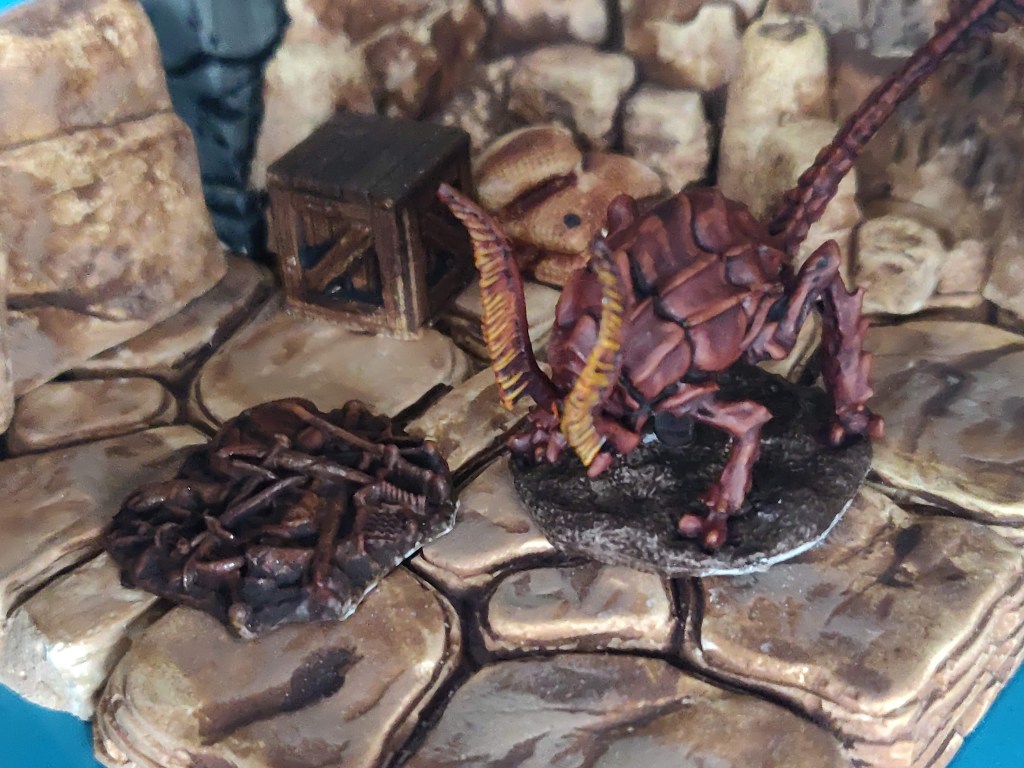
And finally we pick out the highlights on the plates and antennae with the base colors. We’re paying special attention to the back legs, which have a lot of nice detail, and the antennae, which have a lot of really nice feathery detail. It was at this point that I decided to hold off on the metallic highlights, since the overall matte color looked more natural than adding a layer of metal, but if you want to hit yours up with a light drybrush, go right ahead! Sometimes the fun of painting is the journey, and how the figure communicates to you as you build color and personality.
And that’s pretty much it! For the weapon pile, I based it in Charred Brown, then hit it with an irregular coat of Terra Cotta, and drybrushed it with Vallejo Silver Plate.

Limiting your color palette with something like a Rust Monster is almost a no-brainer; there are many animals that are only variations of two or three colors, so it follows that you would only utilize a very limited number of paints on something that fills an ecological niche. The challenge comes when you start picking limited color palettes for humanoid figures, armies or dioramas, which can have a dramatic effect on the cohesiveness of the scene or unit. Of course, having said that, if you want to make your Rust Monster bright orange, red, or even a riot of yellows, purples, and blues, that’s perfectly fine! What’s important is that you do the best you can, follow through, and finish. Then you’ll have a solid paint job that will look great on the table.
Happy Painting!