
So you’ve got a mini, some paint, and you picked out a couple of good brushes. Now all you need is a place to paint! This can be as simple as spreading some newspaper on the kitchen table, but you’ll probably want to think about a dedicated (or semi-dedicated) spot to set up shop. This has a few benefits; if you have a dedicated workspace, it’s easier to start painting; you don’t have to move things out of the way, or take time from painting to worry about setting up. If space is limited, you can keep your supplies in a carry-all bin like this one, or even a tackle box like this one. These make it easy to pack your paints and materials away if your table needs to pull double duty.

My own workspace is fairly small, although I have a shelving unit to my left that holds most of my supplies. Having storage space to the sides of your desk, or the wall in front of it, will help open up what space you have. If you’re lucky enough to have a dedicated hobby room, then your options are almost limitless. For now though, we’ll assume you’re working with a smaller space, which is advisable if you’re still deciding whether to jump into this hobby headfirst. Either way, there will be a few things you’ll need to round out your supplies and get you on your way.
Let there be light
One of your first concerns is light. If you’re at a kitchen table, or a sunny breakfast nook, you may be able to take advantage of the light that’s readily available, either natural from the windows, or from the main lights in the room. I started out painting on a screened-in back porch, myself, so I’m familiar with this option. The limits, though, will become apparent pretty quickly. One, you’ll be dependent on daylight, so your available hours to paint will be limited. Two, if even if you’re using bright ambient light, you’ll notice that some detail may still be obscured by the limited angle of the light. You can remedy this with something as simple as this desk lamp.
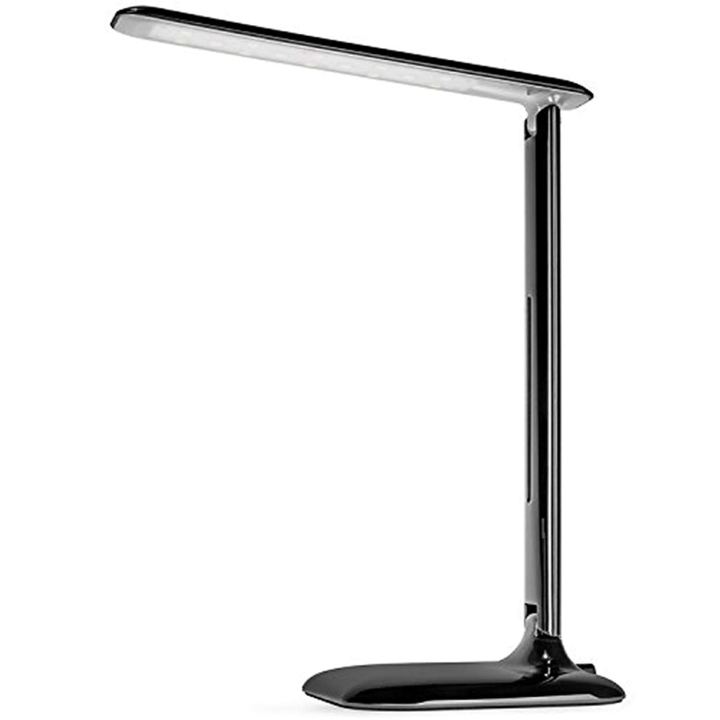
Most LED lamps will be more or less neutral to natural. Incandescent light bulbs will run more yellow, although you can find daylight bulbs fairly easily. One thing about desk lamps is that they are usually designed for writing or reading, so they may not be as adjustable as a lamp made for art or crafting.

I personally use an OttLite Slimline Task Lamp. It’s bright, but not overpowering, and really cuts down on eye-strain. It lets me see the paints more or less as they actually are, and is adjustable to pretty much any point I need. It also doesn’t take up much room on my desk. You can also look at magnifying lamps if you’re having a hard time seeing some of the finer detail.
Laying out the welcome mat
You’re definitely going to want to put a layer between the table and your project. In the beginning, just some newspaper or a paper towel is fine; you’ll need a paper towel for wicking water and extra paint off your brush anyway, so you can kill two birds with one stone with this option. But if you’re serious about minis, eventually you’re going to want to cut something with a hobby knife, and for that, you’ll want a hobby mat. Hobby mats are made out a stiff, resilient plastic and are designed to close up quickly after they’ve been cut into by a sharp X-Acto knife. You’ll often see them referred to as “self-healing,” since the gouges close up so tightly they won’t impact the surface.
I have an Excel 60002, which is very similar to this one on Amazon. Most will have at the very least a grid for helping eyeball measurements, and some (usually designed for military modelers) have templates for common insignia or other patterns used by hobbyists. They come in a variety of sizes to suit any size workspace. You really can’t go wrong upgrading to a hobby mat as soon as you feel comfortable.
Speaking of knives
You will definitely want to pick up an X-Acto knife and a set of clippers, since you will eventually be cutting things off sprues. X-Acto knives can also help clean up mold lines and flash on some figures, too. You can start with just a basic X-Acto knife and a couple blades, or if you plan on eventually working on scenery and terrain, pick up an intro set with a few different handles and blade types. A pair of clippers will help remove delicate parts from a sprue where a knife might be awkward or put undesirable pressure on delicate plastic parts. Finally, if you’re working with metal figures, a set of needle files will be very helpful in cleaning mold lines and smoothing out imperfections in the metal.
A word on Workflow
If you take a liking to the hobby, there is going to come a time when you have multiple pieces in various stages of progress. This is as inevitable as having more unpainted minis than painted minis (you will always have more unpainted minis than painted; it is the mystery of the craft). This is when having a basic workflow for your figures will come in handy. It doesn’t have to be complicated, as you’ll see from my example:

This helps keep the figures organized as they move through the process of assembly, cleaning, priming and painting. You may have more steps in your process, so basically just work out whatever works best for you. Keeping your figures organized in a smallish but accessible area will help keep you from getting overwhelmed by the inevitable size of your collection.

A little off the topic of this post, but I was wondering if you were planning on making a post about storage, transport, and display. Currently, the minis I have are stowed away in an old case we got at the hardware store used for keeping different sized screws, socket bits, etc.
Not exactly the best for displaying the finished product…
LikeLiked by 1 person
I thought I replied to this a while ago, but this is an excellent idea for a post! There are a lot of good storage and transport solutions, and more than a few fun ways to display your figures.
LikeLike